Showing posts with label props. Show all posts

Sunday, July 20, 2014

Gorn Masks and Dragon Heads

A few years ago I made a replica of the mask used to portray the monstrous "Gorn" in the classic Star Trek episode "Arena", where he matched wits and brawn with the formidable force of nature known as William Shatner. My Gorn mask was built according to my personal opinions of how the original mask was constructed, as there is very little info on the subject.
You can read about the making of my Gorn mask here:
http://loneanimator.blogspot.se/2011/09/wrestling-with-gorn.html
The mask was actually eventually sold to Bobby Clark, the stuntman who played the monster. Bobby is now touring Trek conventions displaying my mask as the best replica he's seen, and he should know since he spent several days encapsulated in the hot rubber suit.


Here's Bobby with my mask at the actual location where "Arena" was filmed. I guess that's kind of cool!


Bobby had some reservations about my version, as the original was apparently bigger, and the eyes were covered with glittery sequins. I haven't been able to find any sequins as small as they appear to be in the stills from the episode, but there might've been a sequin of that type in the 1960's. Maybe the Trek costume department had the stuff on hand.


My old Gorn mask seems to be worn out and Bobby contacted me to ask me to make a new copy. Ideally, a new bigger version would've been much better, and I am actually working on that now, but to meet Bobby's convention schedule, a copy of the old version will have to do. So I recently sent a new Gorn mask off to him, along with a plastic baby hatchling. You can read about the making of the Gorn baby here:
http://loneanimator.blogspot.se/2011/09/making-gorn-baby.html
Now, is making copies of monsters someone else has designed and established a fun job? Not really, although it seems to be a popular way of making a name for yourself as a creative person. I see many wonderfully made replicas of the Alien, the Predator, and other famous movie monsters. But  I'd much rather  make my name doing my own thing.
It's surprisingly hard work copying what what's been done before, and the simpler the design, the harder it is to get it right. Just try to draw Donald Duck off the top of your head. I'm trying to do less of this kind of work, though getting an order from an old monster performer is flattering and hard to say no to.


During the past four months I've been juggling four part-time jobs. I wouldn't recommend it, as I came very close to experiencing a burnout. I have friends who have gone through this ordeal, and it's no joke. One of my jobs was building props for the outdoor stage show "The Brothers Lionheart", based on a very popular Swedish children's book. I made plastic helmets, rubber spear tips, and similar stuff, but the main big thing was creating the paw and huge head of the dragon Katla. The production team bought a previously used fiberglass dragon head from another stage show. This head was very poorly detailed, and my job was to build up a completely new surface on it. This entailed mixing sculpted and cast skin pieces with structures built up directly on the fiberglass surface. I actually used a thick acrylic paint mixed with cotton to create Katla's new skin, and the result was a very durable, leathery structure.


Here's the Katla head with a new lick of paint, but still not quite finished.


Katla in action during the show. A smoke gun located in the mouth and nostrils  provided necessary dragon ambiance, along with loud sound effects and dramatic music. Apparently Katla's a success with the audiences.

This is my last stage production. I've made a loooooot of them, starting when I was 13, creating props and masks for a fairy tale show. It's always hard work, but usually there's also lots of fun. Now, the fun seems to have gone out of the equation, and it's just work for me. As success coach Brian Tracy says, "if you're stuck in a job you don't like, get out of that job as you would get out of a burning house." And as the old Klingon proverb goes, "only a fool fights in a burning house."
For the sake of reducing stress and disappointment in my life I've now learnt to use the most powerful word there is: "NO!" Now I say no to all offers of working on stage productions. Instead I'm focusing all my efforts on my personal work, i e my miniature animation work, with occasional props and masks created for my own films, or for projects of close friends. If I can't use my creativity to put joy into my life, then what good is it for? I've no idea if my personal work will ever result in any sort of monetary success, but now that seems unimportant. I'm more concerned with what kind of legacy I can leave behind, and I'd rather realize my own ideas than someone else's. I've heard people say that's a pompous and presumptuous attitude, but shouldn't we believe in our own talents and abilities? Seriously; we must believe that our work comes to good, is important to other people, and is worth every second of effort.

Wednesday, May 7, 2014

Aladdin: Props and makeup

As I've mentioned before in my posts, right now I'm working half-time at a project called "Media Power", where special needs people of all ages learn how to blog, make interviews, do pod casts, make videos, and generally find out how to use the free social medias to promote themselves and their various interests. I'm the technical go-to guy, and I also try to think up fun stuff for the crowd to do. Last year we made three short films; among these "Beans vs Aliens", which I covered in a couple of posts here. 


Now I'm feverishly editing our next project" Aladdin and The Magic Lamp", which was all shot in front of a green screen. This means I'm now spending my days (and sometimes nights) compositing every single scene for this 20-minute film. It's a huge experiment, and an incredible amount of work. However, I felt this was the only way to make a visually exciting representation of this evergreen fairy tale.


My two co-workers on the project, Jenny and Mia, have worked very hard on it too, but the brunt of the work has fallen on my shoulders. I feel that my colleagues don't feel it's necessary to put in as much effort into the production as I do. But I want people to be surprised at what we have accomplished, using fairly primitive equipment. As for our actors, they're certainly a motley crew both in talent and commitment. Emil, who plays Aladdin, is doubtlessly the big star, carrying the narrative of the fantastic story with great panache.


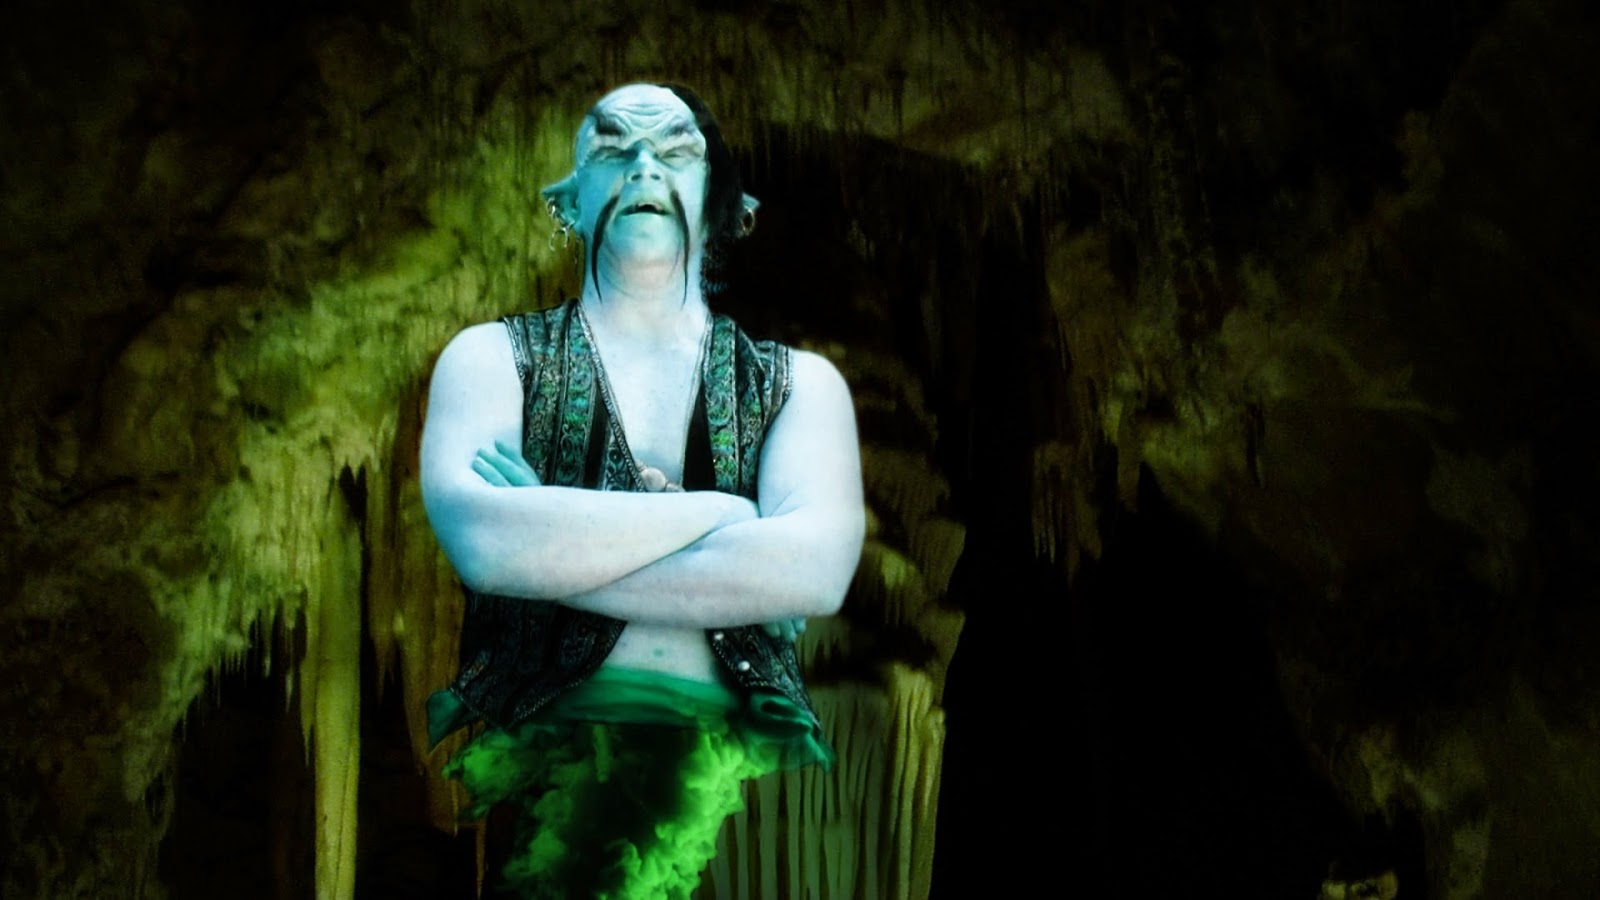
I thought it might be interesting to show some of my work on this project, so lets start off with the genie of the lamp. Not having a properly impressive genie would make for a poor Aladdin story, so I decided to apply some rubber to the face of our genie actor Henrik to make him less meek in his appearance. I slush cast a bald cap, a forehead and two pointy ears in latex, using old plaster moulds made for orc and dark elf mask pieces. The appliances were stuck on with ProsAide glue, and the edges covered up with a ProsAide/microballoon paste.


Crepe wool hair was used for the eyebrows and mustasches, and also for a ponytail eventually added to the top of Henrik's head.


Rubber mask greasepaint covered with a sealer was used to blend skin and latex to a uniform look.


I can't say that Henrik particularly enjoyed the process of being made up into the genie, but once the makeup was complete and he went in front of the camera he forgot about the uncomfortable mask, and acted out his domineering genie part to the hilt!


When filmed Henrik sat on a stool with a piece of the greenscreen tucked into his pants. A red sash provided a barrier between his body and what would in After Effects editing become a traditional legless smoke-pillar lower body. His skin tone was also changed in AE to a properly alien-looking hue.


I wanted to create the look of old Hollywood Arabian Nights epics, where lush costumes make up a big part of the overall enjoyment. For example, we were going to have a couple of palace guards pop up here and there, and I wanted them to have a special look as part of my big scheme. I decided to build a golden shield to be carried by the guards, and used an old plastic snow saucer I bought years ago. My plan had always been to make a shield out of it, but I never got around to it until now.


First, the two handles had to come off, and I used a Dremel drill tool to cut the thick plastic.


I saved one of the handles to create a simple grip on the back side of the shield. Some soft yarn made the handle more comfortable to hold.


The handle was stuck to the shield using hot glue and screws. Bits of wooden dowel placed in the handle ends created durable points of attachment.


Before painting the shield I'm adding some detail. During the summer I haunt the local flea markets and garage sales in search of various interior design brick-a-brack. This piece here is apparently the decorative end bit of a curtain rod. It looks exactly like those brass studs and plates stuck to leather armour in Roman Empire epics, making them look functional as well as attractive. In fact, pieces like this will add some glamour to mostly anything, as you'll soon see.


I'm making a silicone mould from this piece, so I can cast any number of copies in plastic.


A simple containment wall was created using thick paper sealed up with hot glue.


DragonSkin FX was poured over the metal plate to create the mould.


When the silicone had set, SmoothCast 325 dyed black was used for the casting process.


Here's the first one out of the batch..


..And here's a bunch of them, all produced in an afternoon.


The "Roman studs" were stuck on with hot glue, along with some other decorative cast pieces, including a lion's head moulded from a toy shield.


A coat of black base paint was first sprayed on..


..Then followed by durable gold spray paint. I found a metallic paint that stinks to high heaven when you use it (preferably outdoors) but won't chip off as far as I can detect. Subconsciously I seem to have been slightly influenced by the snazzy shield carried by Harry Hamlin's Perseus in Ray Harryhausen's original "Clash of the Titans".


To show just how fast and easy you can piece stuff together, here's a "steel" chest plate made from an ordinary paper plate, another plastic lion head cast, and studs made out of hot glue squeezed into a silicone mould.


Joakim, playing one of the palace guards, is here see sporting the full ensemble. The sword is plastic and aluminum, created for another film project years ago, and the helmet is real steel, and built by my blacksmith buddy Martin Merkel. The armour is real leather, but all the decorations are plastic castings.


I couldn't find a real old oil lamp, and the only ready-made fake option was the Disney version. I opted to make my own instead using a cheap sauce boat with some Monster Clay added.


Hot glue and thick paper was used to create a containment area for the silicone.


Skipping the silicone-pouring part, here's the plastic cast right out of the mould.


Some epoxy paste and a plastic bead creates a small lid on top, and a copper spray paint guilds the lily.


Making chroma key effects with consumer film recording equipment is asking for trouble. The results vary from really good-looking to merely passable. The nay-sayers (and there are plenty of those in my native Sweden) ask what the point is then, if I can't make it look professional all the way through.


But I can't be bothered with those who ask "why", just the ones who ask "why not?" There are many levels of creativity, and if you're not making your art for the sake of commerce, then it's your damn duty to make it for the fun of it.
Lastly, and perhaps not surprisingly, I've managed to infuse this version of Aladdin with some stop-motion monsters. More about those in an upcoming post.


Friday, September 23, 2011

Making a Klingon skull (just for fun).


Last year I made a Klingon skull, which I thought might look pretty fancy in my DVD shelf (and it did). And let's face it; What would your rendition of Klingon "Hamlet" be without it?? I've done skulls used as props in stage shows before, so making the actual skull was no news for me, except for the fact that it was going to be slightly bigger than an average human skull.


I almost always start off with a sculpture made in Chavant clay. This clay is oil-based and used by the US car industry to sculpt prototype car bodies. But you can buy it at many retailers of ceramics materials and sculpture houses. The thing about Chavant is that it's pretty compact and hard when you start off working with it, but the body warmth from your fingers eventually makes it more and more pliable. But if you don't have the patience to wait for that (like me), you can make it instantly soft by warming the Chavant with a heat gun. If you warm it long enough the clay will go into a completely liquid state, so be careful. Warming the clay is good for getting bigger chunks of it soft, so you can clump them together to get your sculpture started. After having worked for a while on the clay blob with loop tools it started to resemble a skull. I used a book with really good images of a human skull as reference.


After about two weeknights worth of sculpting I was pretty satisfied with how the skull turned out. I tried to come up with my own ridge design, but I probably unconsciously nicked it from somewhere. I made a very lazy underside with hardly any details, but those can be added later as separate casts.


This sculpture is getting a mold made out of silicone, which is a good material since you can cast almost everything in it. I use a silicone called DragonSkin Q manufactured(?) and sold by SmoothOn Inc. What's good about this particular brand is that you can measure up the two components in plastic cups without needing any scales. You just measure by eye two equal parts and mix them together. The DragonSkin Q sets in about 8 minutes and is fully cured in 75. I always brush on the first layer to avoid airbubbles. Some always sneak in, but the brushing helps keep them down. Use a really cheap brush, `cause after you've dipped it in silicone it goes off to brush heaven.


After this first layer I add up to five layers of silicone with a thickener added. This makes it easy to just slap it on like butter.


I also add some tints to each new layer of silicone, so I know I've covered all surfaces.


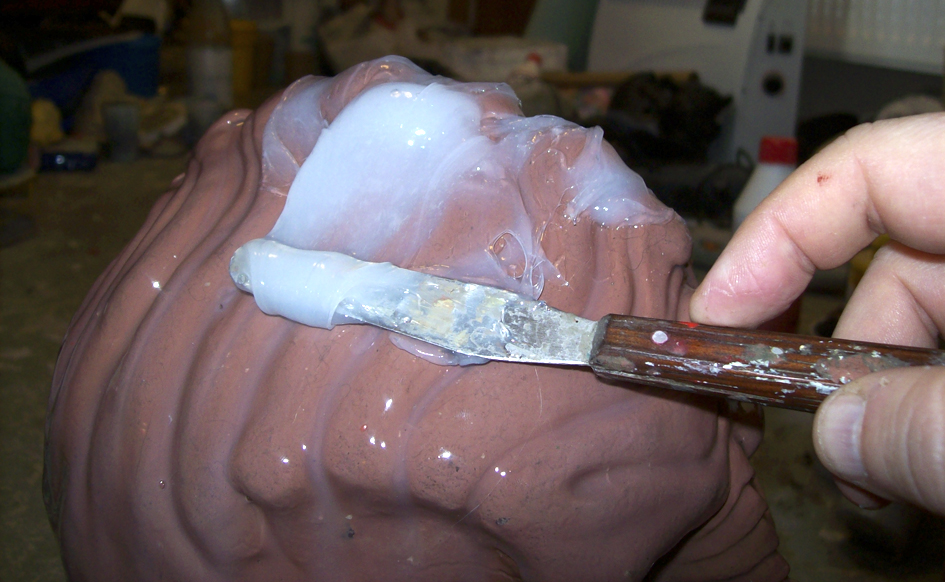
I like to add a support shell to some part of the silicone mold. If I don't it'll just flop around in my hands when I try to cast something in it, since the silicone is so soft. The nasty-looking stuff I'm mixing here is another SmoothOn product called Shell Shock, which is a brushable plastic.


I just ladle it on thickly over the back end of the skull mold. I put the mold on a black trash bag, since the plastic is pretty drippy. If I hadn't had any Shell Shock at home I would've used plaster bandages, which works almost just as well too.


When I'm casting in the silicone mold I'll put it into its plastic "cradle" first, which will help the silicone mold stay put in its shape until the material cast inside the mold have cured.


The silicone mold is so soft the sculpture comes out pretty intact. Only some of the teeth have fallen off.


I've cut a hole in the slit on the underside, where I'll pour the casting material. Time for more SmoothOn product placement! I'm using one of their plastics called SmoothCast 325. Like all the other stuff you mix two parts 50/50 and pour it into the mold. I've also added black pigments; If I hadn't, the plastic would have turned semi-transparent amber (which can be cool, but not for this project). I realized I actually didn't have enough plastic at home to make a strong enough casting, so I reinforced by pouring in Foam-it, which is a rigid polyurathane foam. It's very light but very hard.


Here's the finished plastic/foam cast pulled from the silicone mold. You can see the yellow foam shine through here and there.


You can swab down your casting with alcohol if you want to remove all traces of oil from the silicone, but I've never had any problems with DragonSkin molds, so I just go straight to priming it. Sometimes I use auto primer in a spray can, other times I use a transparent airbrush color primer (like I did now). It helps the paint stick better and I usually finish my paint jobs by spraying primer over the whole thing as a sealer.


A mix of white and earthy brown acrylic airbrush paints are sprayed on, and a thin layer of brown and yellow are added over that with some brown shading.


And there you go. If you want even better results, go out in your garden and rub some dirt over the skull; it actually takes any shine from the paint job off and adds unmistakeable details of age and wear. If you don't want to go through the hassle of molding and casting you can buy a plastic skull replica and build the Klingon features up with plumber's epoxy putty, making your sculpture and finished prop in one. Of course, having a mold means you can make copies of your skull :)