

My two co-workers on the project, Jenny and Mia, have worked very hard on it too, but the brunt of the work has fallen on my shoulders. I feel that my colleagues don't feel it's necessary to put in as much effort into the production as I do. But I want people to be surprised at what we have accomplished, using fairly primitive equipment. As for our actors, they're certainly a motley crew both in talent and commitment. Emil, who plays Aladdin, is doubtlessly the big star, carrying the narrative of the fantastic story with great panache.

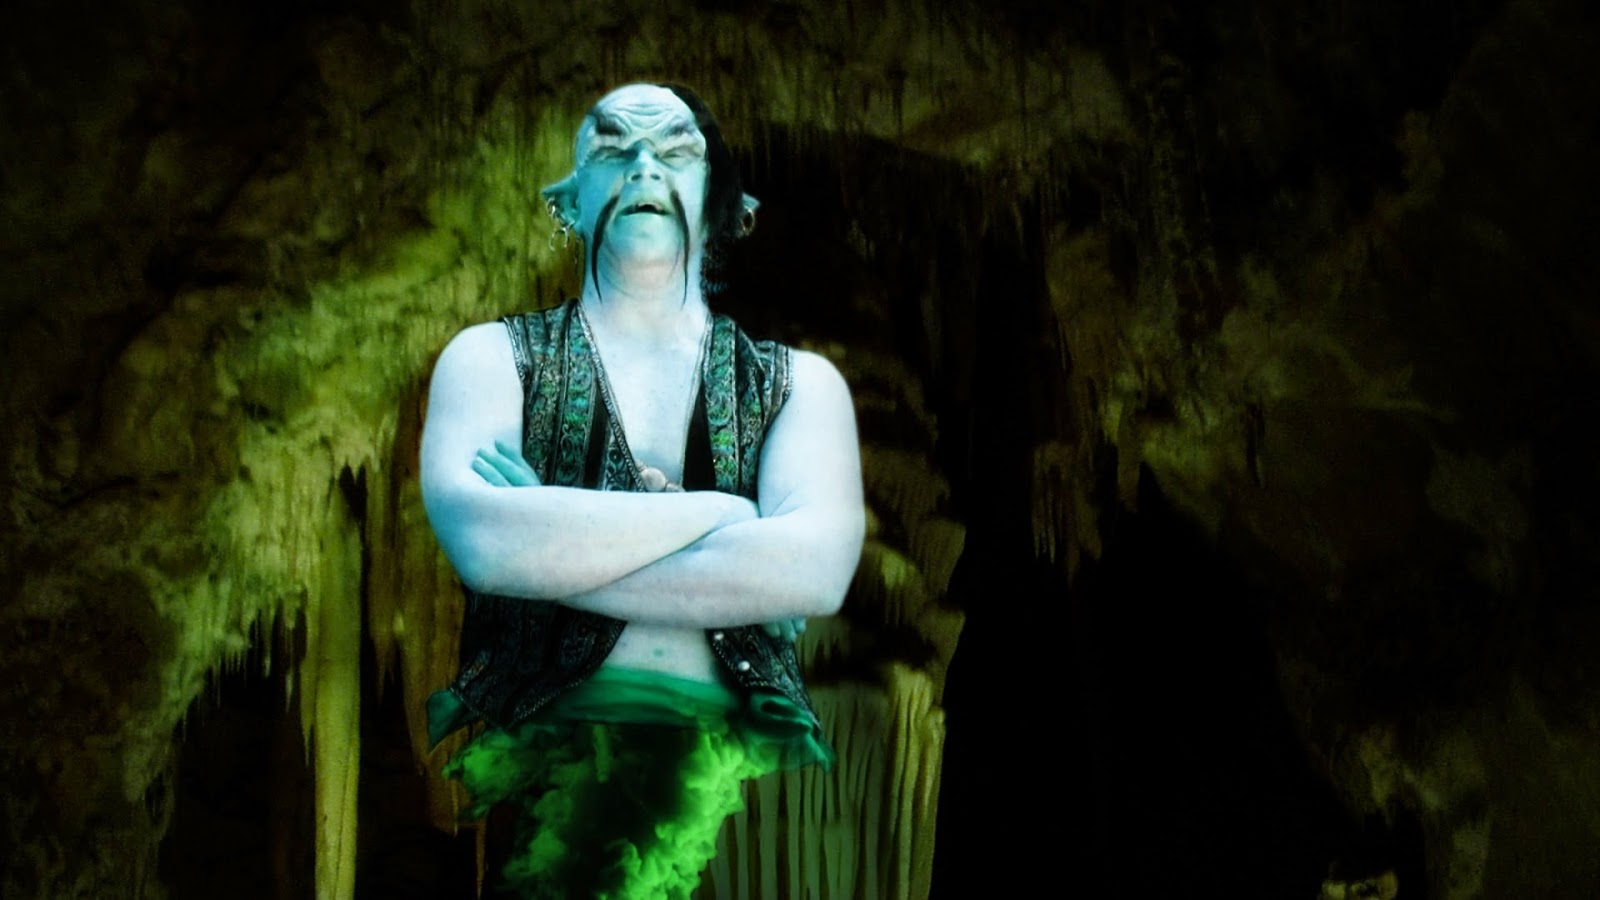
I thought it might be interesting to show some of my work on this project, so lets start off with the genie of the lamp. Not having a properly impressive genie would make for a poor Aladdin story, so I decided to apply some rubber to the face of our genie actor Henrik to make him less meek in his appearance. I slush cast a bald cap, a forehead and two pointy ears in latex, using old plaster moulds made for orc and dark elf mask pieces. The appliances were stuck on with ProsAide glue, and the edges covered up with a ProsAide/microballoon paste.

Crepe wool hair was used for the eyebrows and mustasches, and also for a ponytail eventually added to the top of Henrik's head.

Rubber mask greasepaint covered with a sealer was used to blend skin and latex to a uniform look.

I can't say that Henrik particularly enjoyed the process of being made up into the genie, but once the makeup was complete and he went in front of the camera he forgot about the uncomfortable mask, and acted out his domineering genie part to the hilt!


I wanted to create the look of old Hollywood Arabian Nights epics, where lush costumes make up a big part of the overall enjoyment. For example, we were going to have a couple of palace guards pop up here and there, and I wanted them to have a special look as part of my big scheme. I decided to build a golden shield to be carried by the guards, and used an old plastic snow saucer I bought years ago. My plan had always been to make a shield out of it, but I never got around to it until now.

First, the two handles had to come off, and I used a Dremel drill tool to cut the thick plastic.


I saved one of the handles to create a simple grip on the back side of the shield. Some soft yarn made the handle more comfortable to hold.

The handle was stuck to the shield using hot glue and screws. Bits of wooden dowel placed in the handle ends created durable points of attachment.

Before painting the shield I'm adding some detail. During the summer I haunt the local flea markets and garage sales in search of various interior design brick-a-brack. This piece here is apparently the decorative end bit of a curtain rod. It looks exactly like those brass studs and plates stuck to leather armour in Roman Empire epics, making them look functional as well as attractive. In fact, pieces like this will add some glamour to mostly anything, as you'll soon see.

I'm making a silicone mould from this piece, so I can cast any number of copies in plastic.

A simple containment wall was created using thick paper sealed up with hot glue.

DragonSkin FX was poured over the metal plate to create the mould.

When the silicone had set, SmoothCast 325 dyed black was used for the casting process.

Here's the first one out of the batch..

..And here's a bunch of them, all produced in an afternoon.

The "Roman studs" were stuck on with hot glue, along with some other decorative cast pieces, including a lion's head moulded from a toy shield.

A coat of black base paint was first sprayed on..

..Then followed by durable gold spray paint. I found a metallic paint that stinks to high heaven when you use it (preferably outdoors) but won't chip off as far as I can detect. Subconsciously I seem to have been slightly influenced by the snazzy shield carried by Harry Hamlin's Perseus in Ray Harryhausen's original "Clash of the Titans".


To show just how fast and easy you can piece stuff together, here's a "steel" chest plate made from an ordinary paper plate, another plastic lion head cast, and studs made out of hot glue squeezed into a silicone mould.

Joakim, playing one of the palace guards, is here see sporting the full ensemble. The sword is plastic and aluminum, created for another film project years ago, and the helmet is real steel, and built by my blacksmith buddy Martin Merkel. The armour is real leather, but all the decorations are plastic castings.

I couldn't find a real old oil lamp, and the only ready-made fake option was the Disney version. I opted to make my own instead using a cheap sauce boat with some Monster Clay added.


Hot glue and thick paper was used to create a containment area for the silicone.

Skipping the silicone-pouring part, here's the plastic cast right out of the mould.

Some epoxy paste and a plastic bead creates a small lid on top, and a copper spray paint guilds the lily.

Making chroma key effects with consumer film recording equipment is asking for trouble. The results vary from really good-looking to merely passable. The nay-sayers (and there are plenty of those in my native Sweden) ask what the point is then, if I can't make it look professional all the way through.
But I can't be bothered with those who ask "why", just the ones who ask "why not?" There are many levels of creativity, and if you're not making your art for the sake of commerce, then it's your damn duty to make it for the fun of it.
Lastly, and perhaps not surprisingly, I've managed to infuse this version of Aladdin with some stop-motion monsters. More about those in an upcoming post.

8 comments:
This will be cool!
I like the Genie. Kind of reminds me of face-off. Wish I could do makeup like that!
ANTEDILLUVIAN is getting wrapped up, either plan to make a kaiju flick or a film about Mars. Either way, I'm getting anxious to move on.
I got an idea! I read the SINBAD story a while back. How about a cave of giant snakes!
Kelston
My genie is much simpler than anything created on Faceoff, but it works quite well anyway :)
Congrats on Antedilluvian! I think you have a great concept there and am looking forward seeing the finished film.
Did you know Harryhausen wantede to film the giant snakes bit for one of his Sinbad movies, but never got around to it for several reasons.
I'd love to do my own Sinbad movie. It's bound to happen eventually!
What program do you use to make the video's chroma key effects? I have one that only does still images- is there one that does the whole video?
"But I can't be bothered with those who ask "why", just the ones who ask "why not?" There are many levels of creativity, and if you're not making your art for the sake of commerce, then it's your damn duty to make it for the fun of it."
Richard, I like your style!
Brent
Great work.
I was wondering, I'm going to use Moster Clay for casting some Kaiju heads. Do you heat it up first, or just use it right out of the box? Just wondering.
Also, yes, I knew Ray Harryhausen wanted to make "the valley of vipers" for the Golden Voyage of Sinbad, but scrapped it. Too bad, the concept art looked fantastic.
Aldo have some new stuff on my blog. Thanks for responding.
Kelston Hubler
1999MrLegoman: Sorry for my late reply, I hope you'll find my answer and get something out of it. I use After Effects CC, which I subscribe to via Adobe's "Creative Cloud" service. In AE I then use KeyLight for my greenscreen effects. KeyLight is very tolerate when it comes to shadows and colour variations on your green background, so if you don't have the ideal lighting you can still get away with quite a lot.
Brent: Thanks! :) I tell it as I see it. I've been told far too many times to stop my creative wanderings and do something more "artful" instead. I can't relate to bullsh*t like that.
Kelston: Yes, I warm my Monster Caly with a heat gun before using it. That way I can quickly regulate just how firm I want the clay to be. Using it as it is out of the containiner is almost impossible.
Thanks for responding- If your interested, I recently constructed a dinosaur puppet and made a short clip with a chroma key background. It is on my youtube channel here: https://www.youtube.com/watch?v=t1sgDBJanFM&list=UUFtI5YaNcoisA_r4TASfMbw
Your blog and videos have been incredibly helpful and I am now working on a video where the dinosaur attacks a Pt boat
Very useful blogpost on Aladdin Genie Lamp. We, @ ArtyCraftz recently added impressive, stylish & high-quality design of Aladdin Genie Lamp made from Brass. It’s a great option for anyone looking to decor home or gift.
Post a Comment