For years I've been thinking about making a film based on the legends about the Russian witch Baba Yaga. I always saw wonderful opportunities for stop-motion animation, both for the character herself and her chicken-legged hut. All my films are pretty short, but within the framework of these videos, I wanted to do something with the subject.

Let's start by talking about how the hut puppet was made. Compared to most of my puppets it's pretty big. I wanted that size so I could add details and textures that would look believable, at least within the context of my project.


Baba Yaga's hut is a log cabin, and I guess the right way to do it would be to create it out of real wood. But since I'm not a skilled woodworker I fell back on what I do know. I'm a decent sculptor, so I decided to make the logs out of clay. I used medium grade Monster Clay, and simply rolled long "logs" on a plastic tray.

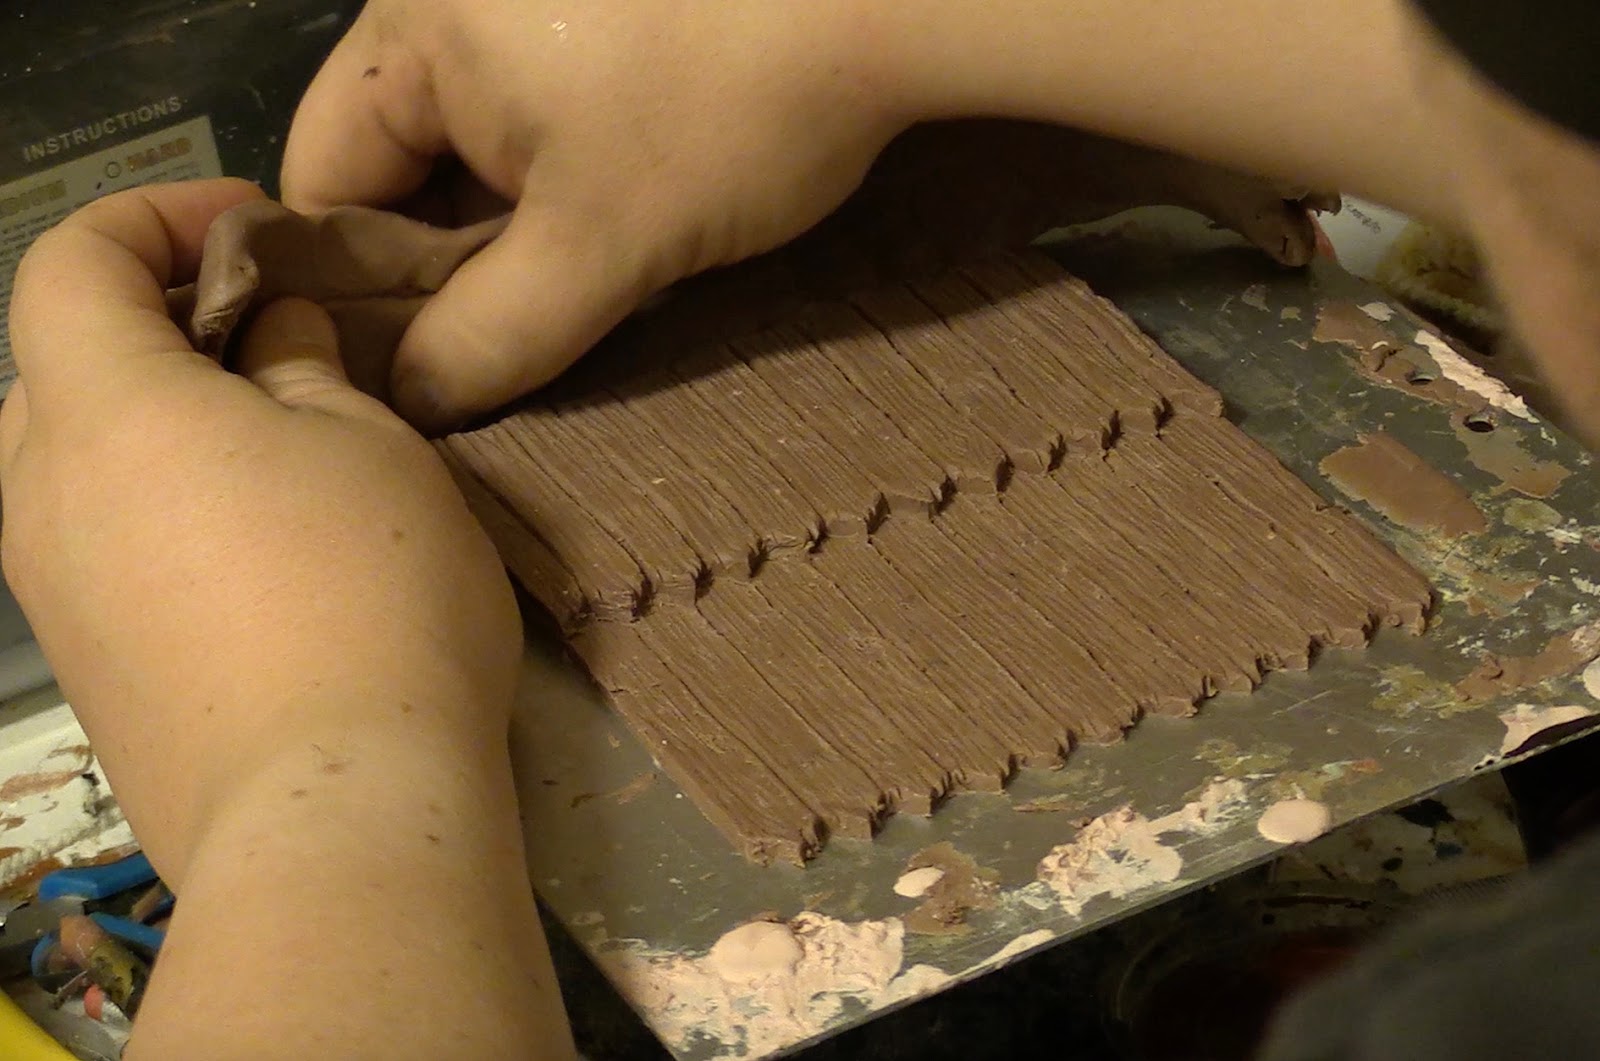
I measured out a spot along all the logs where I would cut into them to make an indentation to interlock the logs.


I used a sharp loop tool to cut into the clay. This way I could place the logs over each other the way a big log cabin is built (I'm assuming).

So, here are all the clay logs laid out and ready to interconnect.

And here's how they look when stacked into a square shape. As you can see I've kept the rough ends of every log. I wanted them to look uneven.


I used small loop tools and pointy tools to carve details into the clay. A door frame and a window frame were also added to the outside of the cabin shell.

I will create a plaster mold around the sculpture, so I've covered the hole at the top with a piece of cardboard, and I'm building a clay wall around the cabin so the plaster can be contained and controlled.

The first layer of plaster is painted on with a sturdy brush, so air bubbles will be eliminated. I'm using hard dental plaster.

Another layer is applied with a spatula and when that has dried I'm adding burlap dipped in plaster.
This will create a stronger mold, while allowing me to actually use less of the plaster.

Jumping ahead a bit, I've removed the clay from the dry plaster mold. I'm now adding tinted latex to create the first layer of the hut cast -the outside surface of the hut.


The latex layer is reinforced with cotton dipped in lates, which when dry achieves the feel of leather. After a couple of layers of this mix of materials has set I add a fast-setting plastic called SmoothCast 65D, which lines the inside of the latex skin. Now I have a "body" for the hut which is both durable and light weight.

I need more details for the hut, so I'm making a few more "wood work" pieces in clay.

Here's another latex cast made from a clay sculpture and a plaster mold. It's the tiles for the roof. This latex cast is also backed with cotton and latex, and attached to cardboard with contact cement.


The two sides of the roof are joined with hot melt glue and pressed together. You can also see that a wainscoted upper floor has been added, also attached to a bit of cardboard.

Here's another bit. This one will cover the inside of the outcropping roof section.


Now over to the all-important chicken feet. They are constructed with three mm thick aluminum wires bundled together. A t-nut is attached to the underside of the feet to provide a threaded tie-down. The "bones" in the legs are created by lashing nails to the aluminum wires using soft string.

The legs are padded with polyurethane foam and then covered with bits of latex skin cast in plaster skin molds.

Claws made from cotton dipped in latex is added to the toes using liquid latex as a glue. Latex tinted light grey is then sponged on to create flexible paint covering the legs.

The legs are stuck to a piece of plywood using hot melt glue, and then another bit of plywood pressed down over the hot glue using a glue clamp.

More cotton and latex are added over the plywood square to make it look organic.

The plywood bit with the legs is stuck to the bottom of the hut using more hot glue, a LOT of hot glue, actually.


It was cast in latex, with cotton/latex backing, from a dental plaster mold (please pardon the blurry image).

The other bony decorations were made from Super Sculpy, a polymer clay hardened by heating it in a kitchen oven. They were created for a project many years ago but lay unused in a plastic bag in my workshop.


Additional details are a chimney, also cast in latex, and decorative barge boards cut from cardboard. I've added feathers to the legs, grouse feathers I think, by dipping the ends of the feathers in latex and pressing them against the latex skin of the legs. The door is also made from cardboard with aluminum wire hinges. The door handle is a bone made from thermoplastic attached to a screw.
That's it for the magical chicken-legged hut. In the next part, I'll talk about how Baba Yaga herself was made and also how the film, in general, was put together.