Showing posts with label chroma key. Show all posts

Monday, February 26, 2018

The Age of Invention: Filming

In the summer of 2016 I shot the live-action footage for a caveman comedy, which then went through extensive editing because of a faulty microphone and because I almost over-reached when I got to the FX work. But now it's finally looking like near completion, so it's time to start sharing the work on this project with you.


These two happy chaps are our heroes, from left to right, Andreas Pettersson and Joakim Strömgren. They were participants in a media project aimed at people with slight disabilities, for which I worked the better part of three years. Both of them have slight mental disabilities (and Andreas is almost blind in one eye), but they're quite independent and far less glum in their outlook on life than I usually am. Eventually this project ran its course, and nobody stepped in to finance or take over it, so it quietly died. However, by this point Andreas had bought his own camera and editing software, and started making his own short videos. I wanted to stay in touch with Andreas, Joakim and others from our group, so I concocted this film to keep working with them.


The story is basically about the invention of the wheel, and the ensuing problems. As usual I shot the whole thing in front of a green screen, but outdoors. The weather was fine up until the very last shot, after which it started to pour down.


Despite using this pretty primitive set up, I'm quite happy with how the composits in After Effects turned out. All backgrounds are pieced together in Photoshop using stock images. I used a warm filter to unify the final compositions.


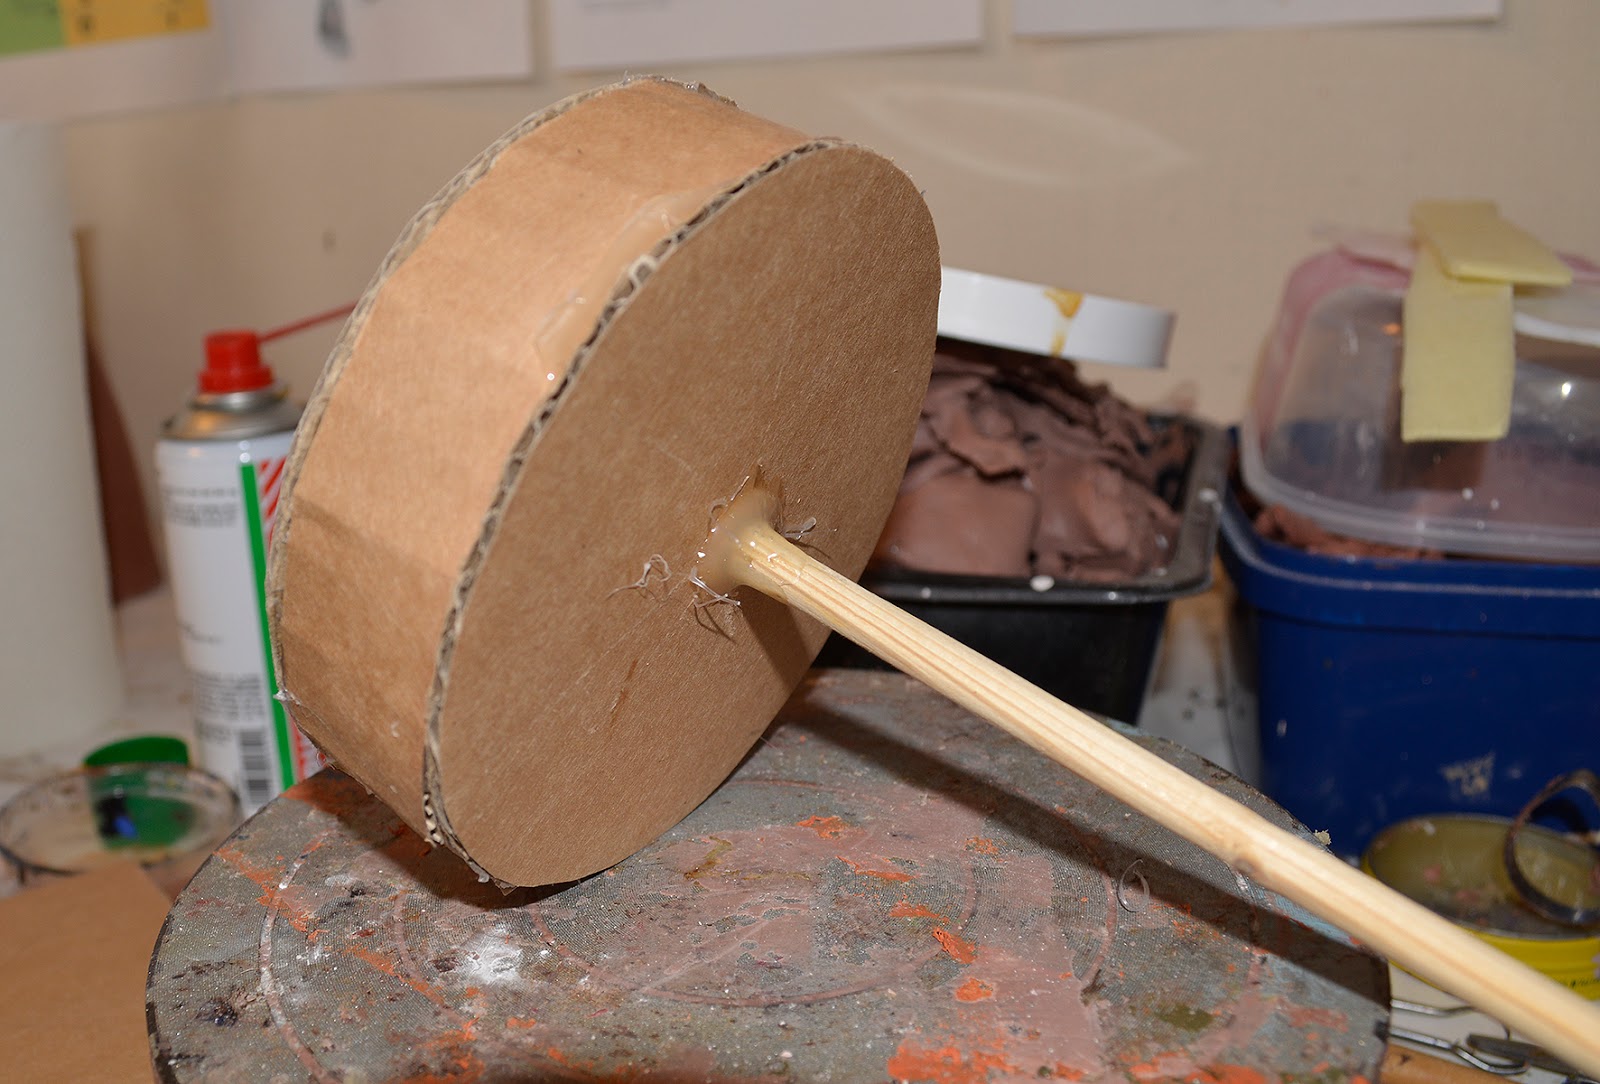
The costumes are as plain as they can be. I bought two fur coats at a garage sale and cut them up to look like the traditional cartoon caveman garbs. I bought three cheap wigs online (the third comes into play in one part of the story), and the other props plus some stone age jewellery were culled from previous projects. You might wonder what the heck is going on in the photo above. Well, keep reading..


This arrangement is supposed to represent the intrepid inventors trying out the wheel for the first time. Joakim and Andreas are sitting on a couple of bar stools, draped over with a green screen. Apart from the legs of the stools disappearing down holes dug by the numerous moles that infest my garden, the set up worked quite well.


The actual locomotion of the venture is supposed to represent a circus act of a kind. It's not exactly a perfect effect, but the general idea seems to be communicated. Andreas right leg disappeared behind the green screened stool, so the right leg used in these shots is actually mine, shot separately and added in its own layer in AE.


The wheel is a real low-tech construction: Some bits of cardboard glued together and covered with a mix of latex and cabosil, painted grey. A wooden rod is attached to the backside, and I simply spin the contraption with my fingers in front of my camera, backed by a green screen.


This is what a final shot can look like. As you can see they're chased by a stop-motion bird, but there will also be other prehistoric critters in this film. No dinosaurs, though. I opted for slightly cartoonish post-dino creatures instead, since they're hardly ever represented on film.

In my coming posts I'll detail the making of these puppets, as per usual. Andreas and I are actually starting up a new group project for disabled people, where we'll focus on making short films. We have some valuable support from a Swedish educational organization, and later this year I'll be reporting about our escapades there. I'm sure it won't surprise you that there'll be some stop-mo critters appearing in those videos too.

Friday, March 4, 2016

What Is It?: Digital Trickery

My DeviantArt friend Jeff Kwasniewski has written a lot of funny and inventive poems, most of them in the realm of fantasy or horror. I was especially charmed by one of them, "What Is It?", which is an hommage to the ghost stories of English writer and scholar M R James. If you haven't read any of James´ work, get yourself out on the Internet right now and start Googling, or listen to any audio book version, OR get the DVD box set of the BBC "Ghost Stories For Christmas" TV movies, which frequently adapt the stories from this author.
Jeff's prose poem follows the hapless narrator who inadvertently sets loose an eldritch horror, apparently once imprisoned in Eton Collage chapel by James himself. I decided I wanted to make a short film based on this text, and set to work on it last fall, building a puppet and planning the shots. A couple of weeks ago I filmed the live-action footage, which I'm now editing in After Effects and Adobe Premiere Elements. This entry in my blog will be about the work in that editing process, which I hope you'll find inspiring, as I think it shows that you can go a long way with a bit of inventiveness and planning.


My buddy Andreas Nordkvist plays the narrator, though the actual text is read by Jeff himself. On and off through the past years I've had access to a big room in a local boarding school just a stone's throw from my house. That's where I've been putting my lights and my green screen, but that building is now under renovation, and I've had to look for another available space. Luckily for me, my nearest neighbour, a big archive, is now happily letting me use their facilities, which has resulted in me getting better sound and even more space to play around with. However, for this little adventure I only went with a very simply arranged green screen, since it was all I needed.


Most of the story takes place in Eton, UK. On Pond5 I found a few stock footage shots of the college. I settled for one of them, showing a bustling street with the college in the background. The clip cost $50, which stang a bit, but I wanted something more than just a still image from Wikimedia to establish the beginning of the story. As you can see, Andreas is pretty seamlessly inserted into the stock footage. This is thanks to the Primatte Keyer After Effects plugin, combined with Key Correct, both of them included in the Red Giant Keying Suite. I see now that it's priced at $799, but I recall that it was slightly cheaper when I bought it about a year ago. At any rate, this software has proven to be worth every penny.


For example, if the filmmaker turns out to be an idiot, which I can be sometimes, then all is still not lost. Take this mad shot: We wrapped the green screen around Andreas´ car and did not anticipate the problems that would follow with sunlight being filtered through bright green cloth. This shot should be impossible to save, however..


..With the help from Primatte along with some color adjustment tools in After Effects it was possible to get a decent, if not perfect shot after all. So, why not simply get in the car and actually go for a real drive? It's still winter over here and the trees are completely bare. Some more stock footage from Pond5 makes up the moving background, which is actually an English country road.


Regular green screen shots, especially close-ups, are much easier to work with, and it's possible to quickly pull your actor out of the background and stick him/her into any new surroundings.


The background here is a Photoshop collage with images from various sources. When the final shot is rendered out I add a filter from Rampant Color FX, which unites the various elements in the shot and creates a smoother look for your composite image. However, if you don't want to spend any money on grading your films there are numerous free resources online. Just do a Google search for "grading filters for after effects".


In this shot I've also added layers of dust in the air; one behind Andreas in the sunlight, and one in front of him. It's a moving camera shot, which means that we're closing in on Andreas, with the stacks of books and papers seemingly in front of him and closer to the "camera", This trick is achieved by adding layers of still images on top of each other. The chroma key footage of Andreas is placed between those. There are eight layers of images in this shot, and all of them are turned into 3D layers in AE and spaced with various lengths between each other, using the "Camera" function as a guiding tool. I'm just rushing through the procedure here, but if any one's interested I'll do a proper guide for this type of trick shot. I'm simply showing that you have quite a few options on how to make a shot composed of almost just still images really come alive. The zoom created in AE achieves the illusion that you're in a real room, thanks to the 3D layer effect.


Now on to some meatier stuff. Here's an interesting shot. In the story the hero is forced to escape from a chapel cellar, where he has inadvertently released an evil entity; the "It" of the title. He's rushing back up some old stone stairs to escape the creature. The boarding school I live next to has a lot of stone stairs, stone walls and other bits of interesting architecture. I decided to use one of the stairs for this shot, as I couldn't achieve it by only using the green screen alone. I stood about midway up this flight of stairs holding the folded green screen, and had Andreas stumble in panic up the stone slabs.


In Photoshop I created this mask using free texures found online.


In the final shot I've added this mask in AE, also using the masking tool to draw around the parts of Andreas that were obscured by the mask image. This meant that I had to draw frame by frame around him for parts of this shot, but as he moved fast I didn't really have too many frames to worry about. When this shot was rendered out I also added a few color grading filters.


Here's another shot that illustrates quite well that you can go a long way with a little ingenuity. This huge field is another neighbour of mine. Andreas just ran across it towards the camera.


In After effects I then added a Photoshopped mask of an English cottage, along with some foreground silhouettes of wind-swept trees, some free digital rain found and downloaded from YouTube, and finally a grading filter on top of it all to soften the shot. Placing the cottage mask correctly over the live-action footage I could actually have Andreas running out the door.


So, what's all this running about, then? Well, here's a quick glimpse of the "It" following our hapless hero as it surprises him in his cottage. But more about this creature in the next blog post.


Sunday, November 8, 2015

Making "H P Lovecraft's The Other Gods"

I never did a behind-the-scenes video for "The Other Gods", but since people keep asking me questions (mainly about the puppets) on YouTube, I decided to make one.


Thursday, January 1, 2015

"The Other Gods": Filming Cosmic Horrors In a Tiny Green Room


First of all: Happy New Year! Let's help out making 2015 a really swell year. Unfortunately, 2014 was almost only work, work, work for me, and not of the fun kind. But never mind that now; new year, new possibilities.

We're off to Lovecraft Land again with my latest video effort. This is another of my projects that's been lingering on for a couple of years, bit which is finally getting to the finish line with editing and effects work.
First a few words about the actual story. "The Other Gods" is apparently an early effort by weird fiction master H P Lovecraft. Scholars say that it's an example of the influence of Lord Dunsany's lyrical and mystical tales on Lovecraft's imagination. This one is sort of a moral tale, with a couple of characters sticking their noses into business they'd better leave alone. Barzai the Wise and his disciple Atal climb mount Hatheg-Kla to spy on the dancing gods of the Earth, but find out too late that they do not dance alone..


My stalwart buddies Håkan Håkansson and Björn Hansson tackled the moderate challenge of portraying Barzai and Atal, and my equally reliable voice-over artist John Hutch supplied the narration, providing the gravitas that only a genuine English accent can create.
We filmed the whole thing in one 2013 afternoon, in my crammed green screen room.


Håkan looked suitably sage in a fantasy astrologer/astronomer outfit..


...And Björn might actually pass for Sinbad the sailor in his get-up. Something that got me thinking regarding future projects.

All the scenes were pieced together in After Effects. I now subscribe to software in Adobe Cloud, and therefore have access to all the tools I need for my creative digital work. Or almost all tools. The standard AE plugin Keylight is very good, but since I almost never get the ideal quality green screen shots I always think I'll get, I need stronger stuff to pull a good enough key. So I coughed up the $799 Red Giant want for their Keying Suite, which includes Primatte Keyer, Key Correct and Warp. I'm very happy with the results I'm getting, so for me it was certainly worth every penny.


Here's how the opening shot of Barzai in his tower looks when finished. I'm still sticking to a not-quite-real look, which is inspired by both Ray Harryhausen's fantasy films as well as more experimental auteur's like Karel Zeman. 


Here's how the full background image looks. It's created in Photoshop and consists of 22 layers. The various bits are photos from Wikimedia, travel photos from friends and other sources. I love creating my "sets" in Photoshop, since the possibilities are endless. There are, in fact, no limits to what you can stitch together for your film.


Since the background image is so big, I could flip it and use bits of it for close-ups of Håkan. The telescope is also just a photo collage.


All in all, there were only three background images created for the tower interior. In some shots we actually used natural sunlight coming in through a window to light the green screen set-up. It worked better than I at first thought it would.


Walking in the desert might seem like a difficult thing to do, when you only have a green screen with a length that will allow for about four steps. The solution is simply to film each actor in two separate shots, and then combine them in AE. And have them walk very slowly.


You can even climb mountains, though your green screen studio feels like a closet. You only need a few seconds here and there to convey each part of the story.


And, of course, you have to prod your poor actors to crawl around in scenes which they have no idea how they'll turn out in the end. This little studio is history now, since the building is being renovated. Now I'm using another space, which I have to pay a small rent for since it's at a school, and I'm not the only one using . Ideally I'd love to have a big room just for myself, but that'll have to be a future project. It's on my dream list.


Without giving too much away (if you haven't read the story) things don't go too well for our heroes. Here's Björn with scratches and sores made up with fake blood and bread crumbs.


Barzai's fate is a grim one indeed, and it's probably correct to say that he's the first in a long line of Lovecraftian protagonists that meet a sticky end. So what is Barzai actually looking at? Well, since the story is called "The Other Gods" it's presumably clear that it's not the beings he climbed the mountain to have a peek at. More about those in a coming blog post, but here are a couple of dancing monstrosities to hopefully tickle your fancy.


Wednesday, May 7, 2014

Aladdin: Props and makeup

As I've mentioned before in my posts, right now I'm working half-time at a project called "Media Power", where special needs people of all ages learn how to blog, make interviews, do pod casts, make videos, and generally find out how to use the free social medias to promote themselves and their various interests. I'm the technical go-to guy, and I also try to think up fun stuff for the crowd to do. Last year we made three short films; among these "Beans vs Aliens", which I covered in a couple of posts here. 


Now I'm feverishly editing our next project" Aladdin and The Magic Lamp", which was all shot in front of a green screen. This means I'm now spending my days (and sometimes nights) compositing every single scene for this 20-minute film. It's a huge experiment, and an incredible amount of work. However, I felt this was the only way to make a visually exciting representation of this evergreen fairy tale.


My two co-workers on the project, Jenny and Mia, have worked very hard on it too, but the brunt of the work has fallen on my shoulders. I feel that my colleagues don't feel it's necessary to put in as much effort into the production as I do. But I want people to be surprised at what we have accomplished, using fairly primitive equipment. As for our actors, they're certainly a motley crew both in talent and commitment. Emil, who plays Aladdin, is doubtlessly the big star, carrying the narrative of the fantastic story with great panache.


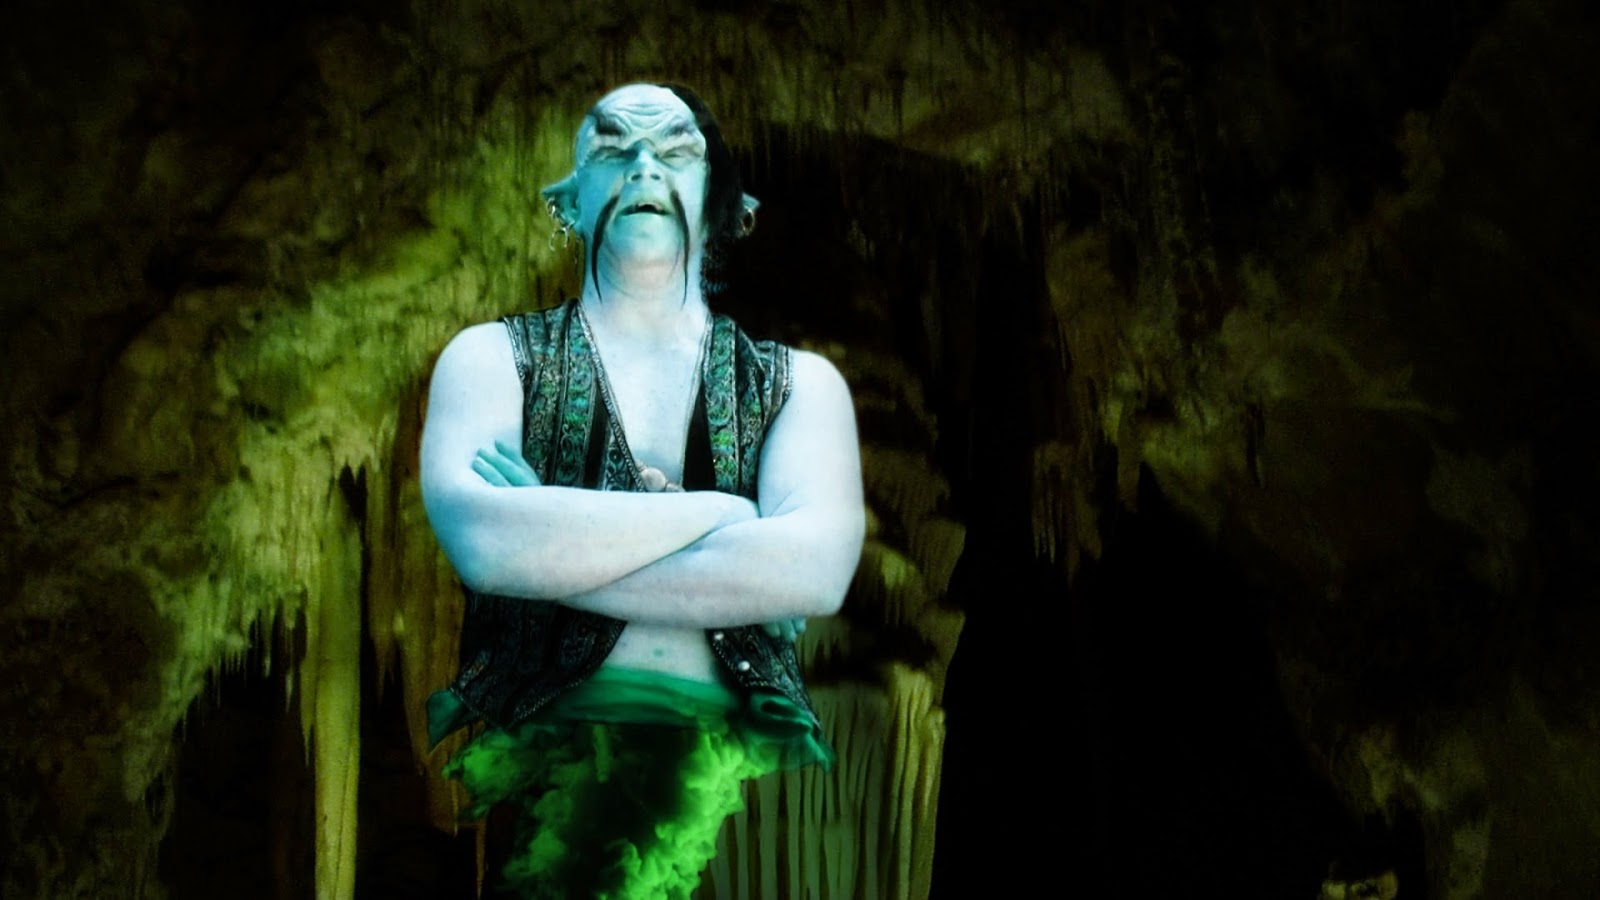
I thought it might be interesting to show some of my work on this project, so lets start off with the genie of the lamp. Not having a properly impressive genie would make for a poor Aladdin story, so I decided to apply some rubber to the face of our genie actor Henrik to make him less meek in his appearance. I slush cast a bald cap, a forehead and two pointy ears in latex, using old plaster moulds made for orc and dark elf mask pieces. The appliances were stuck on with ProsAide glue, and the edges covered up with a ProsAide/microballoon paste.


Crepe wool hair was used for the eyebrows and mustasches, and also for a ponytail eventually added to the top of Henrik's head.


Rubber mask greasepaint covered with a sealer was used to blend skin and latex to a uniform look.


I can't say that Henrik particularly enjoyed the process of being made up into the genie, but once the makeup was complete and he went in front of the camera he forgot about the uncomfortable mask, and acted out his domineering genie part to the hilt!


When filmed Henrik sat on a stool with a piece of the greenscreen tucked into his pants. A red sash provided a barrier between his body and what would in After Effects editing become a traditional legless smoke-pillar lower body. His skin tone was also changed in AE to a properly alien-looking hue.


I wanted to create the look of old Hollywood Arabian Nights epics, where lush costumes make up a big part of the overall enjoyment. For example, we were going to have a couple of palace guards pop up here and there, and I wanted them to have a special look as part of my big scheme. I decided to build a golden shield to be carried by the guards, and used an old plastic snow saucer I bought years ago. My plan had always been to make a shield out of it, but I never got around to it until now.


First, the two handles had to come off, and I used a Dremel drill tool to cut the thick plastic.


I saved one of the handles to create a simple grip on the back side of the shield. Some soft yarn made the handle more comfortable to hold.


The handle was stuck to the shield using hot glue and screws. Bits of wooden dowel placed in the handle ends created durable points of attachment.


Before painting the shield I'm adding some detail. During the summer I haunt the local flea markets and garage sales in search of various interior design brick-a-brack. This piece here is apparently the decorative end bit of a curtain rod. It looks exactly like those brass studs and plates stuck to leather armour in Roman Empire epics, making them look functional as well as attractive. In fact, pieces like this will add some glamour to mostly anything, as you'll soon see.


I'm making a silicone mould from this piece, so I can cast any number of copies in plastic.


A simple containment wall was created using thick paper sealed up with hot glue.


DragonSkin FX was poured over the metal plate to create the mould.


When the silicone had set, SmoothCast 325 dyed black was used for the casting process.


Here's the first one out of the batch..


..And here's a bunch of them, all produced in an afternoon.


The "Roman studs" were stuck on with hot glue, along with some other decorative cast pieces, including a lion's head moulded from a toy shield.


A coat of black base paint was first sprayed on..


..Then followed by durable gold spray paint. I found a metallic paint that stinks to high heaven when you use it (preferably outdoors) but won't chip off as far as I can detect. Subconsciously I seem to have been slightly influenced by the snazzy shield carried by Harry Hamlin's Perseus in Ray Harryhausen's original "Clash of the Titans".


To show just how fast and easy you can piece stuff together, here's a "steel" chest plate made from an ordinary paper plate, another plastic lion head cast, and studs made out of hot glue squeezed into a silicone mould.


Joakim, playing one of the palace guards, is here see sporting the full ensemble. The sword is plastic and aluminum, created for another film project years ago, and the helmet is real steel, and built by my blacksmith buddy Martin Merkel. The armour is real leather, but all the decorations are plastic castings.


I couldn't find a real old oil lamp, and the only ready-made fake option was the Disney version. I opted to make my own instead using a cheap sauce boat with some Monster Clay added.


Hot glue and thick paper was used to create a containment area for the silicone.


Skipping the silicone-pouring part, here's the plastic cast right out of the mould.


Some epoxy paste and a plastic bead creates a small lid on top, and a copper spray paint guilds the lily.


Making chroma key effects with consumer film recording equipment is asking for trouble. The results vary from really good-looking to merely passable. The nay-sayers (and there are plenty of those in my native Sweden) ask what the point is then, if I can't make it look professional all the way through.


But I can't be bothered with those who ask "why", just the ones who ask "why not?" There are many levels of creativity, and if you're not making your art for the sake of commerce, then it's your damn duty to make it for the fun of it.
Lastly, and perhaps not surprisingly, I've managed to infuse this version of Aladdin with some stop-motion monsters. More about those in an upcoming post.