Like last month's post, this entry is about a project that started off as a YouTube shorts project, until I rejected that idea. In the end, I ended up just making a very short, silly video.
My inspiration for the ghost in the film was this Victorian illustration. I have no idea where it's from but it's included in a huge book on supernatural literature, which I've had for years.
I sculpted the face in medium-grade Monster Clay on a flat slab of aluminum and did all the rest: a plaster mold of the clay and the casting tinted latex into the mold. The chest area was cast in a mold created many years ago for the demon in my film "Memory."
I wanted striking eyes for the puppet since it would only be on screen for a very short bit. I picked a couple of semi-transparent plastic pearls, for a sort-of luminous effect, and reamed a concave surface into each pearl to create a lens effect. The eyes were detailed with acrylic airbrush paints painted on with a thin brush. UV resin was then added to create the actual lens effect.
I wanted the arms to be really spindly and skeletal, so they were built up with thin metal rods folded over and covered with soft crochet yarn soaked with latex.
When the puppet parts were assembled the whole thing was attached to a wooden rod, one of those you stick into a flower pot to support a floppy plant. Thermoplastic was used to hold it all together.
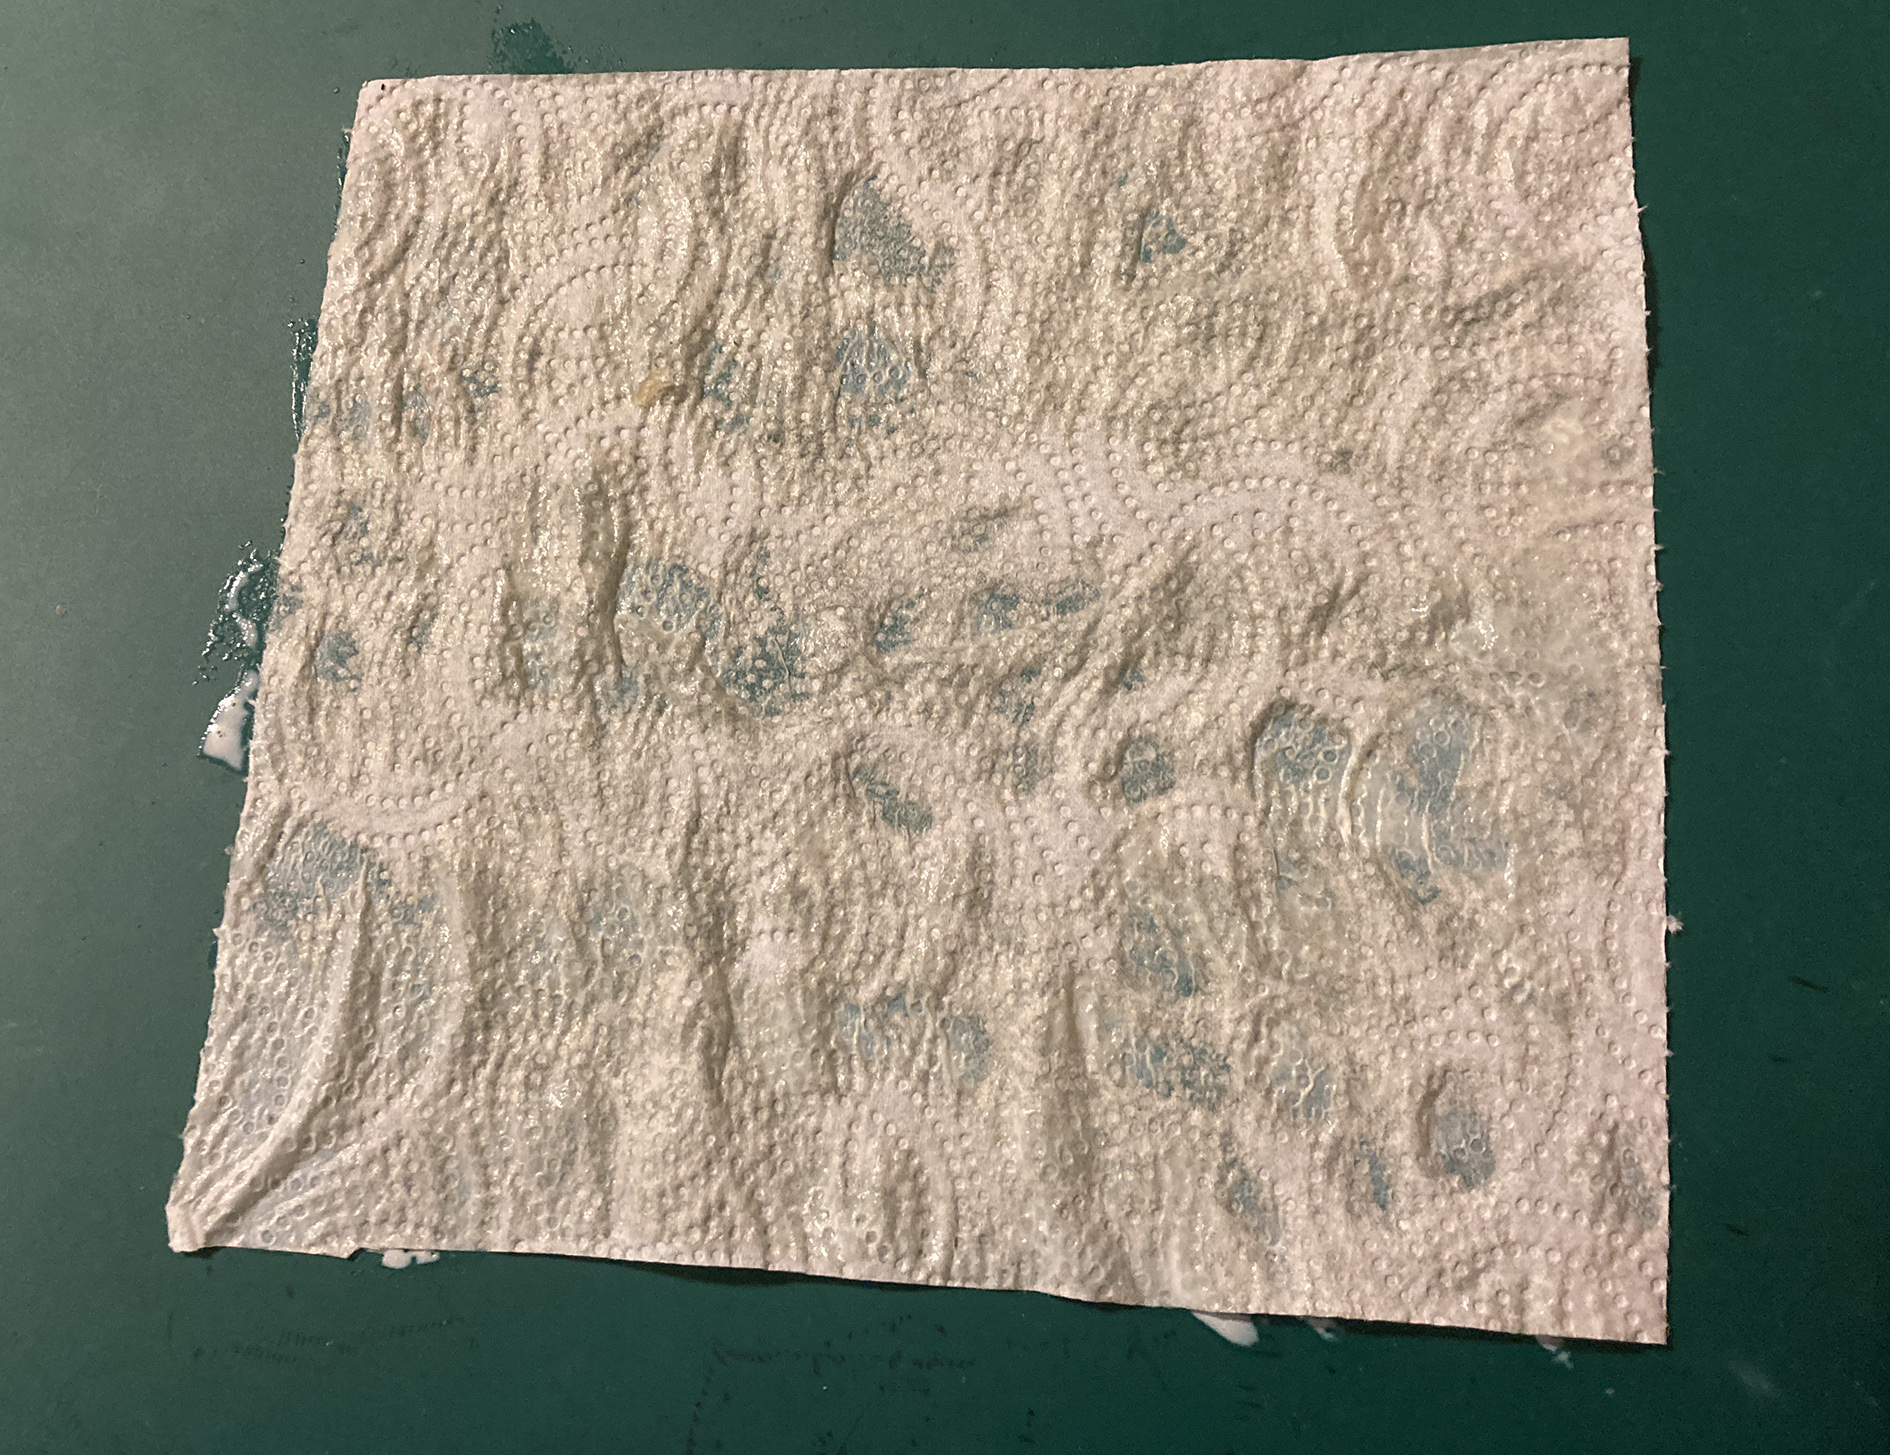
The flimsy garment of the ghost / dead thing was made with kitchen tissue paper soaked in latex. I then simply cut pieces from it and pressed them together. the sticky surface of the paper as a bonding agent.
So, here's the finished ghost. The arms, the neck, and the jaw were the only articulated parts of the puppet. the hair was made from crepé hair (sheep's wool used for fake beards.)
The second puppet in the film is the man who walks by the cave and engages in conversation with the ghost. This is actually a very old puppet, built at the end of the 1990s. It's still holding up, barely. The latex is really dry and brittle but the clothing and the armature are fine. As you can see he hasn't got any real feet because for the film he was originally built, he doesn't show his feet. I didn't make any tie-downs back then, I just clamped the puppet down on a tabletop with a small glue clamp.
Some of my YouTube viewers were disappointed that the film was short and thought it was just "gimmicky." Others thought the film was fun. It was an interesting experiment.
I had the notion to do a Lovecraftian weird tale in the style of a diary or log book and considered writing my own text instead of finding one readily available. This is what I came up with. I think it's filled with enough cliches to feel comfortably familiar. I decided to dispense with any actors, just showing a lonely ship on an ocean that was getting weirder and weirder.
One inspiration for this project was, of course, the horror-filled nautical tales of William Hope Hodgson, but also the rambunctious songs of Swedish singer-songwriter Evert Taube (seen in his element in the photo above). Some of his songs are very long and tell of nautical adventures, some of which he himself took part in. These songs go into great detail, naming the ship, describing the cargo and the destination, and painting colorful pictures of the crew.
I found a few images online showing model ships built for museums, picked one image, and then spent a couple of evenings removing the background in Photoshop. I probably could've made things easier for me, and only included the absolutely necessary details for a ship shown in the distance, but I wanted to be sure that nothing was missing. I added an animated flag waving in the wind atop one of the masts in a couple of shots, as well as engine steam.
The sea in all the shots is stock footage clips, either showing real oceans or CG versions of water. The sky is represented by photos of normal skies, which are then supplanted by stock footage of time-lapse skies, as well as shots of ink and glitter being pumped into a water tank.
When the ship eventually crosses into a different dimension it's escorted by strange creatures floating in the ethereal sea of space. I only made one puppet and animated it moving about. This beastie was built from scratch, and by that, I mean not sculpting anything in clay, but only relying on building up the shapes using materials like latex, cotton, and EVA foam. It’s a fairly quick procedure and very cost-effective. I’m starting with making the eyes, and I wanted big watery eyes for this creature. Instead of resorting to buying glass or acrylic taxidermy eyes, I’m making these using acrylic domes bought in a Scrapbooking shop, and Photoshopped eyes printed out on ordinary printing paper. I’m using transparent scrapbooking plastic to glue down the dome over the eye art, creating a lens effect that looks kind of neat.
For smaller eyes, because this monster will have a bunch of them, I’m adding drops of UV resin over the art and then blasting the plastic with a small UV light. I can then simply cut out each eye from the paper with small, sharp scissors.
The body of this puppet is this leftover plastic casting made from a silicone mold created over an old perfume bottle. This was what I had handy, but I could’ve used an old pill jar or a bit of scrap wood. I made holes in the plastic and attached screws to create points where aluminum wires for tentacles will be placed. If I just attached the wires with glue or thermoplastic to the body, they might come loose, but when they’re hooked up to the screws they’ll stay put.
This little wooden ball will become the head and this single 3 mm aluminum wire will be the neck. To attach the wire to the ball I’m using a few drops of super glue, and then I’m spreading some baking soda over the glue, thus creating a new solid material which helps bond the wire to the wood very effectively. I’m also making a hole on the side of the model to attach a t-nut. This nut will work as an attachment point to my flying rig. This nut is also held in place with the super glue/baking soda combo. To attach the aluminum armature wires to the screws I’m using melted thermoplastic. I melt portions of it with a heat gun and being careful I can then handle the material with my fingers, taking care to move the plastic blob around a bit, so I won't get burned. This creature has three tails or three tentacles growing out from its behind, and I’m making them out of 1,5 mm aluminum wires, covered with soft string and then dabbed with latex. You’ve most likely seen this procedure before. It’s one of my golden oldies.
I wanted something like a strange beak growing out of the monster’s head and for this, I’m using dense EVA foam. Ordinarily, I would’ve made this as a sculpture in clay, then making a plaster mold around it, and then cast a latex duplicate into the mold. But building it up like this saves time, as well as allowing happy accidents to happen.
To add texture as well as to cover up parts of the puppet I'm applying cotton dabbed with tinted latex. Using pointy tools I can create wrinkles and other textures in the material. This method works well for rigid parts of the puppet that won't have to stretch or bend.
Most of the puppet is then covered with patches of wrinkly latex skin cast from skin molds. This skin is very flexible and will work well for the bendy areas on the puppet.
To create extra details I'm adding drops of latex on top of the skin, creating small bumps.
Cotton and latex are also used to build up folds of skin around the eyes, which have been applied using contact cement.
Finally, the whole puppet is painted a dark red using tinted latex and a sponge. When that layer has dried (with the help of a heat gun) I dry-brush on a grey/blue color to offset the deep red, which will still be seen adding shadows to wrinkles and folds.
The finished puppet was animated and held aloft on my flying rig jointed arm. You only see the creature from one side, but I finished both sides with equal effort.
I read the narration myself, as I usually do. I don't consider myself especially gifted at that, but hiring people to do the voice work is getting increasingly expensive.
This film was a fun little experiment. I might do similar projects in the future if I can come up with narratives that fit this form of storytelling.
I sometimes contribute to the various publications of Graeme Philips, which all have Lovecraftian content of some kind. In the booklet "Forbidden Knowledge" I found the poem "Forbidden Words" by Frank Coffman and decided that it would be a perfect addition to my cosmic horror selection on my YouTube channel. After I got Frank's permission to adapt his poem, I set to it.
I wanted to do something that had the atmosphere and look of the AIP Roger Corman Poe adaptations, which meant over-embellishing certain colors, using bombastic music, and a gothic setting with overdressed rooms.
I was briefly contemplating finding a real location for this, but I quickly realized that wherever I went, I'd have to augment the place in After Effects anyway to get the look I wanted. So instead I went with completely digital 2D backgrounds, composed in Photoshop. I mainly used a bunch of stock images found on depositphotos.com, with additional elements added.
For the main character, a man searching for taboo knowledge (aren't they always?), I recruited my stalwart actor Andreas Pettersson, whom you've seen in a number of productions by now.
I shot all of his scenes in his living room in front of a green screen. By now we have this process pretty much down to a T.
The occult book our hero reads from is just an old book -a cookbook if I remember correctly- with a printed-out spread placed into it. The pages are a Photoshop mash-up of parts from a 19th-century astrological calendar.
In the end, our protagonist conjures up a demonic entity, and I could've gone with a number of creatures, but for some reason, I decided to go with a hovering skull. I had a bag of plastic Halloween bones lying around and I thought the included skull had the right dimensions.
As props bought from dress-up shops often are, this skull was made from rather flimsy plastic, and I had to reinforce it by mixing a batch of Burro casting plastic (from FormX in Holland) and lining the insides of the skull with it. After that, I cut loose the jaw and re-attached it to the skull with aluminum wire hinges. In the eye sockets, I placed two tentacles made with aluminum wires wrapped with soft yarn and dabbed with latex, and a long tongue made the same way. The tongue was rolled up and pushed up into the roof of the mouth when not lolling out to be animated. I placed screws on the inside of the skull to help attach the tentacles, the tongue, and the jaw joints. A wooden dowel was also attached to the rear of the skull as a support rod.
The whole skull was then covered with a mix of cotton and latex. This created an organic-looking surface and a base for creating more elaborate shapes.
Using more cotton and latex and using a pointy dental tool I built up a textured skin, with bumps and wrinkles.
I also made teeth with the cotton / latex mix.
I also used yarn to create some of the shapes. This whole procedure is pretty quick and very economical since you don't have to make any molds, but since the latex/cotton mix dries to a sturdy leathery quality it's only applicable to projects where flexibility isn't necessary. using this technique on a full stop-motion puppet would not work at all.
Here's the finished skull before the paint was applied.
I started off with a mix of latex and red pigments sponged on with a bit of foam. This created a very organic-looking base.
Other colors were mixed the same way and dry brushed on with more sponges (bits of foam from an old cushion). I used I light layer of white acrylic paint over everything to get a glowing effect. Lastly, blue acrylic airbrush paint was hand-applied with a brush to offset the other colors and augment the psychedelic effect.
Here's the finished skull puppet. The stand is simply held fast with a glue clamp when animating the puppet.
This is how it looks when piecing together the various elements that make up one of my monster scenes. In this case, I have the animated skull in the front layer, and behind it, I've added layers of smoke and a cloudy luminous background. I've also added a part of the billowing smoke pillar over the skull to create a sort of widow's peak coming out of the top of the head.
The skull only makes a brief appearance, but that's the only thing it should do. This was a very quick project but I'm quite happy with it. Stuff like this is perfect for experimenting with creating mood, which is one of my favorite challenges.
When YouTube started marketing its YouTube shorts as an alternative (and a rival) to TikTok, a lot of people jumped at making very short content in a standing format. There were promises of funds handed out to YouTubers trying out the format, and it seemed the concept gained popularity among watchers. For a weak moment, I considered what I could bring to the table, and thought up a few story ideas adapted for this new format. However, after doing a poll among my own watchers, as well as doing a bit of research among YouTubers trying out making shorts, I decided that it probably wasn't for me. Instead, I simply made shorter-than-usual youtube videos, and they seem to have been well received.
"Yum, Yum Said the Moon" is the first of these shorts-wannabees. The story is childishly simple: A jogger is eaten by a creepy man in the moon. The setting is a bit of nighttime landscape in the countryside, and it never changes during the run of the short film. The setting is a photo adjusted in Photoshop to suit my needs for the film.
Let's go over to the evil moon, the only puppet in the film. I should warn anyone with Trypophobia (a phobia of holes) that you should probably stop reading now since the moon is covered with tiny craters.
This is the main sculpture of the moon, made with medium-grade Monster Clay. I actually sculpted both sides of the face but only covered this side with craters, wrinkles, and other small details. I knew I'd only shoot the moon from this side, so no need to spend time detailing both.
I used simple hobby plaster to create a mold around the sculpture. Four layers of tinted latex created a flexible face.
For the crater-marked skin of the rest of the puppet, I sculpted an oval filled with craters on a flat piece of clay.
Again, hobby plaster was used to make a simple skin texture mold.
And again, a few layers of tinted latex created bits of skin that could then be attached to the body of the puppet.
The moon only has one eye on the side shown to the camera. It's a plastic pearl painted with acrylic airbrush colors and sealed with clear varnish. Here it's placed in a matrix of silicone paste, which allows the eye to be swiveled around by putting a needle in the "pupil" and turning it.
Here the moon has been padded with soft polyurethane foam. Under the foam, there's a 2 mm aluminum wire running through the puppet all the way out into the horns. This is so the moon can curl up and grab its prey with the points of the horns. There's also a 1,5 mm aluminum wire circling the jaw, so the moon can talk and chew.
Here's the moon with patches of pock-market latex skin covering all of the foam padding.
I should also add that a threaded 3M nut is placed at the back, joined with the main 2 mm aluminum wire. This is so I can attach the puppet to a ball-and-socket flying rig, holding the moon aloft.
The puppet is painted by dry brushing tinted latex onto it using sponges, and applying the paint in thin layers. The teeth are made from tissue paper dipped in latex and rolled into pointy shapes with my fingers.
The puppet was animated against my puppet stage green screen backdrop, with green screen tape covering up the flying rig.
The jogger assaulted by the moon is a looped digital animation of a man running in a tracksuit. I simply keyframed him being grabbed by the stop-motion moon and sped up his movement to look like desperate leg-kicking as he was eaten. When the moon licks its mouth I used a bit of pink oil-based clay bought in a toy shop.
So that was "Yum, Yum, Said the Moon", a short bit of silliness. But, it's been surprisingly well received. One viewer commented: "Now THIS is the kind of surreal and niche horror I admire so often!" I can't ask for a better reaction than that.