Some years ago I worked on a project where the band The Creature Preachers were contributing music. This project never grew to fruition, but I kept in touch with the band, as I liked their tunes, and I thought I could make a fun video or two using their music.
About a year ago, I contacted The Creature Preachers and asked if I could use their track "Swamp Witch" plus another one, "The Warlock," which was perfectly fine with them. Although both projects are fully planned out, and I have made a couple of puppets for "The Warlock," "Swamp Witch" was the first to be finished.
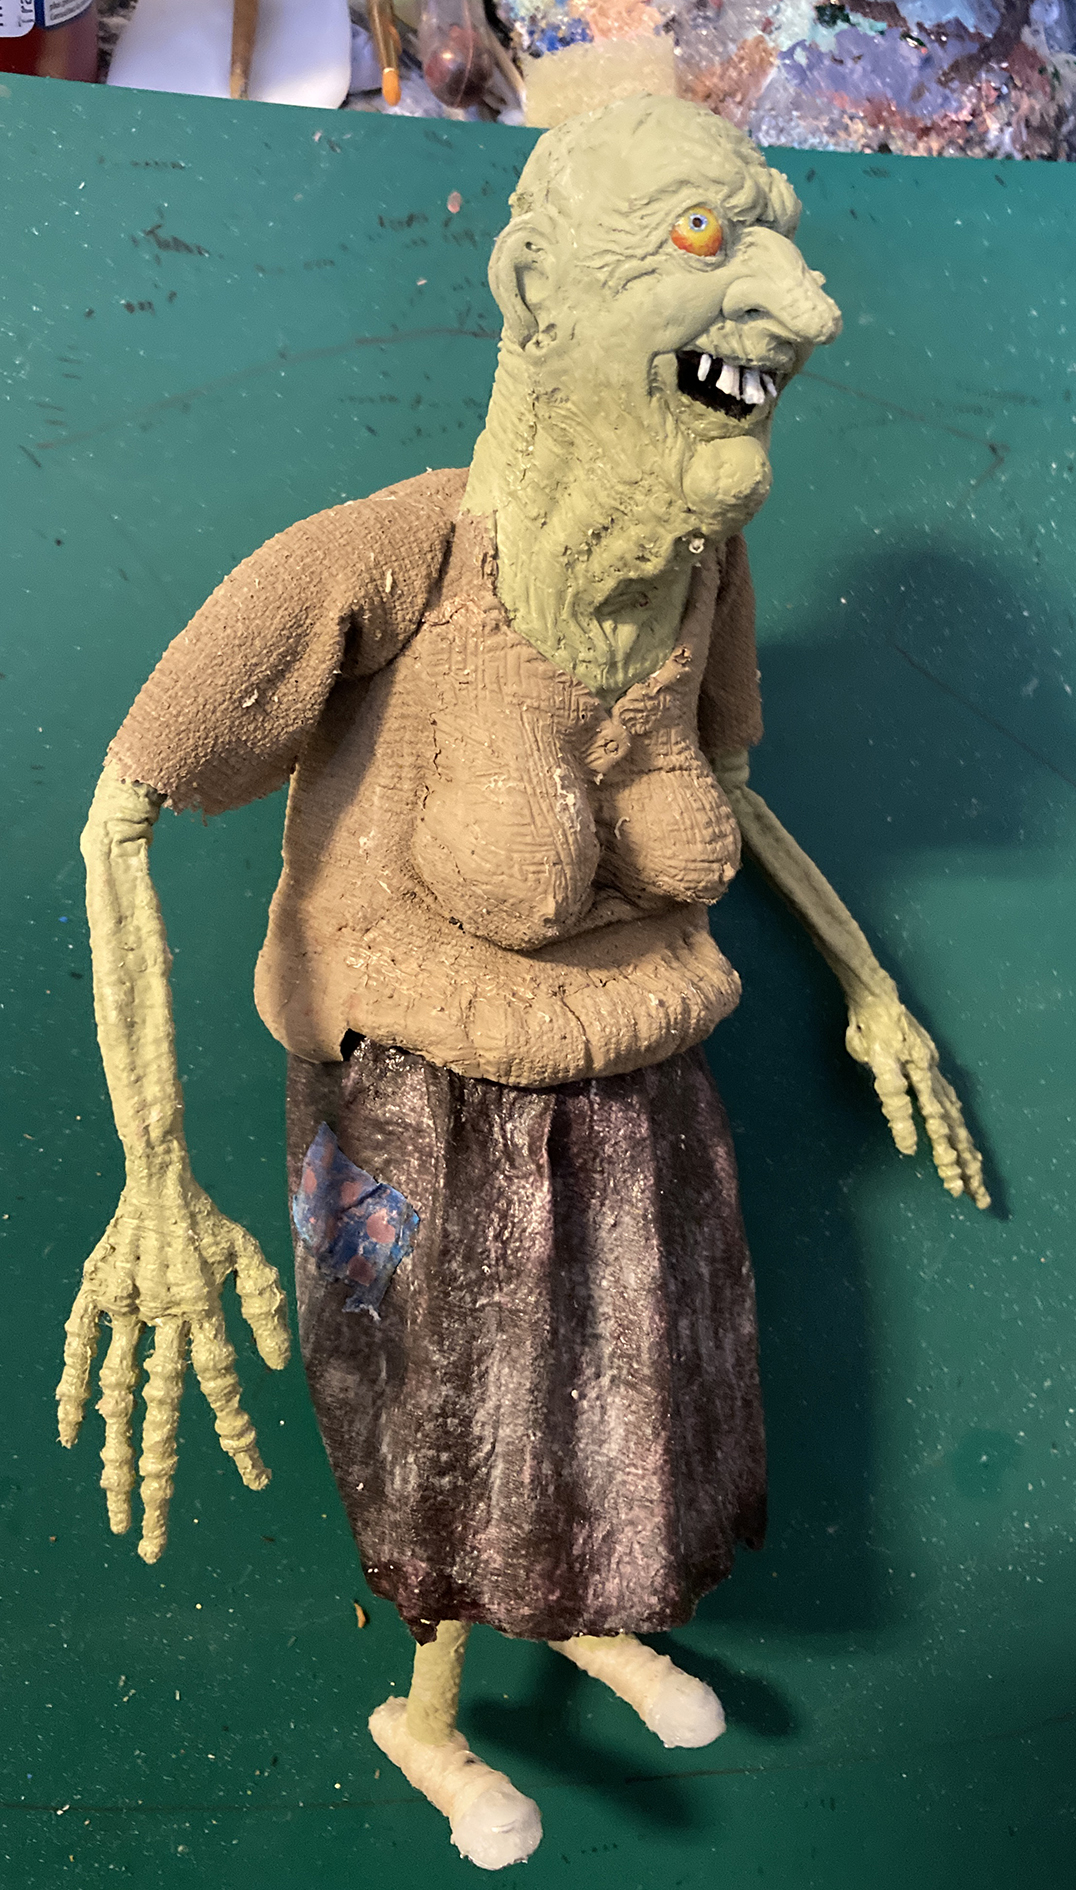
So, let's start with the swamp witch herself. I wanted to go with a look that harkened back to the art of the old EC comics horror titles, as well as later comics like Warren's Eerie and Creepy. All these magazines had great-looking hags and witches. My Monster Clay sculpture reflected that aesthetic, I hope.
I used two batches of tinted latex to cast a rubber skin from a dental plaster mold, one green batch for the witch's skin, and one beige for her shirt.
The armature was made from 2 mm aluminum wires for the body, and 1 mm for the fingers. I included a couple of wood balls attached with aluminum wires to make the breast bounce during animation. In the end, the padding and the latex skin made animating the breasts difficult, so I dropped that idea. If I venture into boob-bouncing on my puppets, I'll use stronger aluminum wires.
Since the character would be covered with clothes, I didn't spend all that much time on the polyurethane foam padding, just making it enough to create the basic shapes I wanted.
The sleeves of the witch's shirt were created by first pressing silicone clay onto a coarsely textured fabric, then painting tinted latex onto that silicone clay imprint. Her skirt was simply toilet paper dabbed with tinted latex. I added one moveable eye, using a painted plastic pearl secured in a silicone socket, and one blind eye made with a mother-of-pearl-colored plastic pearl. Her teeth are tissue paper dipped in latex.
The witch's hair is crepé hair glued on her head using liquid latex as glue. Her apron is made from tissue paper and latex. Her amulet necklace is a bit of garden wire with a plastic pearl slipped on. Her bracelet is another bit of garden wire twisted together in a loop.
The witch's shoes were built up using then polyurethane foam coated with tinted latex several times.
To animate the eye, I inserted a pin into the pupil and swiveled it around.
The witch puppet is fairly small, about six inches tall.
Our next customer is the Skunk Ape; actually a traditional cryptid from the south of the USA. There are a couple of widely spread photos purportedly showing the creature, and I based my puppet on those. I sculpted the face, the chest, and the feet in clay.
I used three mm aluminum wires for the Skunk Ape armature. As for all my armatures, this one is held together with blobs of thermoplastic.
My original plan was to have the puppet wholly covered with fake fur, so my foam padding was very simple.
Here's where the skin would be shown on the ape -all parts covered with tinted latex. The rest would be patterns of fake fur on a soft cloth fabric.
However, I later decided to cover all of the puppet up with latex skin, and instead apply tufts of hair to create a more organic and slightly mangy look.
Again using latex as glue I applied tufts of fake fur cut from an old fur boa, starting from the feet and going up, so the hair overlaid itself in a natural way.
The eyes are two plastic pearls. I wanted something that would, sort of, simulate shining eyes. The beard is crepé hair, and the teeth are tissue paper dipped in latex.
Another cryptid that pops up around Vermont and a few other places is the Pig Man. I thought it'd fit right in as a companion for the Swamp Witch. Now, this puppet was originally sculpted and built for another project that'll be finished next year. However, I replaced it with another design and instead included it in this project.
I used a dark green tint for the latex since the pig creature in the original project would have a bluish-greenish skin color.
Here's a glimpse into the cramped space within the head of the puppet. There's a collection of aluminum wires stuck in thermoplastic moving the ears and the snout.
Another simple armature for this puppet. This is the back of the armature, where you can see the threaded nut in its rear end where the flying rig will be attached. This was an important point in making the puppet for its original project, but in the end, I didn't have to use it for "Swamp Witch."
The padding for this puppet was more detailed since it'll be naked, only covered with patches of latex skin.
All these puppets are painted with tinted latex which was sponged on with a piece of foam. The hair along its back is crepé hair. Again, the teeth are tissue paper and latex. The eyes are two black plastic pearls. The cloven-hoofed feet are cast in Onyx resin from a silicone mold created from a clay sculpture.
Here's another critter that started life as a puppet for another project. Originally, I sculpted the head for a Japanese horse-headed Yokai. I still hope to make my Yokai project eventually, but since I had already finished the head in latex with homemade plastic pearl and UV resin eyes, I thought I'd save some time and use it for this project.
I wanted a creature in the vein of the Jersey Devil, but since I had already made that cryptid as a puppet, and I didn't want to re-use it, I came up with another similar design instead. It's basically a more bird-like Jersey Devil clone.
The latex skin for the torso was also made for another puppet that I haven't built yet. I used the plaster mold made for that puppet and cast this piece for my bird-horse puppet.
I made the lower parts of the legs as thin as I could, basically only using a wrapping of yarn dabbed with latex. Each foot has a three mm threaded nut inserted for tie-down purposes on my animation stage.
The wings have feathers made with adhesive tape wrapped around yarn. The very top of the wings were covered with latex feathers cast in a plaster mold.
Here you can see the smaller latex feathers covering the top side of each wing. I covered up the aluminum wire spine with a pad of EVA foam and thin foam patches.
The feathers were painted with a mix of black, blue, and silver water-based hobby paints. I used a flat brush to apply the paint.
Here I've covered up the whole puppet, including the back, with patches of tinted latex skin. Drops of latex were applied with a pointy sculpting tool to simulate a protruding spine.
I tried out a new kind of flying rig this time, an arrangement that most animators seem to use. I bought two packs of square brass tubes, one snugly fitting into the other. The larger bit was placed in the rear of the puppet.
The smaller tube was attached to a four mm aluminum wire stuck to a metal slat perforated by many holes. I can fix the flying rig to my animation stage with a glue clamp, but I can also use puppet tie-downs, a threaded rod with a wing nut, to secure the rig to the stage using the holes in the base. Inserted into the rear of the puppet, the smaller tube on the aluminum rod holds the puppet very securely during animation.
Teeth and claws are thin cardboard dipped in latex. The short mane is real fur from an old fur hat.
For the shot where the creature lands on the cauldron and grabs hold of its edge, I used a piece of fiber board painted chroma key green.
The backgrounds were actually just one image, a very long one covering the whole backyard of the witch's property. I AI generated a bunch of swampy images using Adobe Firefly and then cut out what I thought were the best bits to puzzle together my ideal creepy swamp in Photoshop. It's the first time I've used AI to create my backgrounds, and I did it mostly for the look, a sort of soft reality that isn't quite photo-realistic. One of my viewers criticized me for resorting to AI, but all others didn't seem to care. I have an Adobe subscription and thought I'd test out Firefly.
The cauldron was an actual photographed item adapted in Photoshop. Then various digital animated effects were applied to simulate steam and other moving textures.