I have a great love for clunky old monster movies, and you don't get much clunkier than the infamous "Robot Monster" from 1953. I don't know why, but the movie has some weird hypnotic effect on me, and I've wondered about what the actual background for the helmeted gorilla-alien was. Thus the development of my prequel "Empire of the Robot Monsters."

You don't build an empire with just one robot monster, so I decided to build at least three of them; two regular Ro-Men, and the Controller or Ro-Man leader (to the far right in the above photo.)

Starting off with the iconic helmet, I used medium grade Monster Clay to create my representation. I really didn't have to bother with making the "prop" too smooth or symmetrical, since the helmets used in the actual movie look like they were slapped together over a weekend using papier mache. But I decided to make my version as slick-looking as possible.


For example, to make the opening of the helmet symmetrical I used the top of a plastic thread spool to make the indentation in the clay, which would allow me to carve out the opening using small loop tools.


The finished helmet sculpture would serve as the base for both the regular Ro-Men and their leader.

A clay wall was built up around the sculpture, and DragonSkin Pro silicone poured in to create a flexible mold.

When the silicone had set I could remove the clay and prepare for casting the helmets in plastic. "Silver Bullet" Cast Magic powder was brushed into the mold. The powder will line the mold and attach itself to the plastic, making the metal color on the helmets impossible to rub off.

SmoothCast 365 tinted black was poured into the mold and slushed around the interior using the roto-casting technique to create hollow plastic castings of the helmet.

Here's how the helmets look when they first come out of the mold. There's some cleaning up to be taken care of, filing off imperfections caused by tiny air bubbles. There are also some small indentations caused by more air in the mold, which was fixed by applying a Warhammer figure paint of the appropriate color.

I'm not really sure what's covering the opening of the helmet in the real movie. I used circles cut from a transparent plastic lid and covered with bits of nylon pantyhose held in place with super glue.

The antenna is made from thick needles and plastic tubes, with yarn dipped in tinted latex used for the cable connecting them. The little mouthpiece, or whatever it's supposed to be, was made by pressing a small blob of thermoplastic into a quickly made dental silicone mold applied over a small clay sculpture.


The armature for the Ro-Men is simplicity itself, with bundles of aluminum wires held together with yarn and thermoplastic. The helmet is attached to a clump of aluminum wires which slides into a hollow wooden dowel. I chose this arrangement so I could attach the head lastly, after the puppet body was finished.

Since the body would be covered with fake fur I only added rudimentary padding using wrappings of thin polyurethane foam. I just needed the general shape of the body.

The feet and the chest area were sculpted in Monster Clay and cast in latex from dental plaster molds.
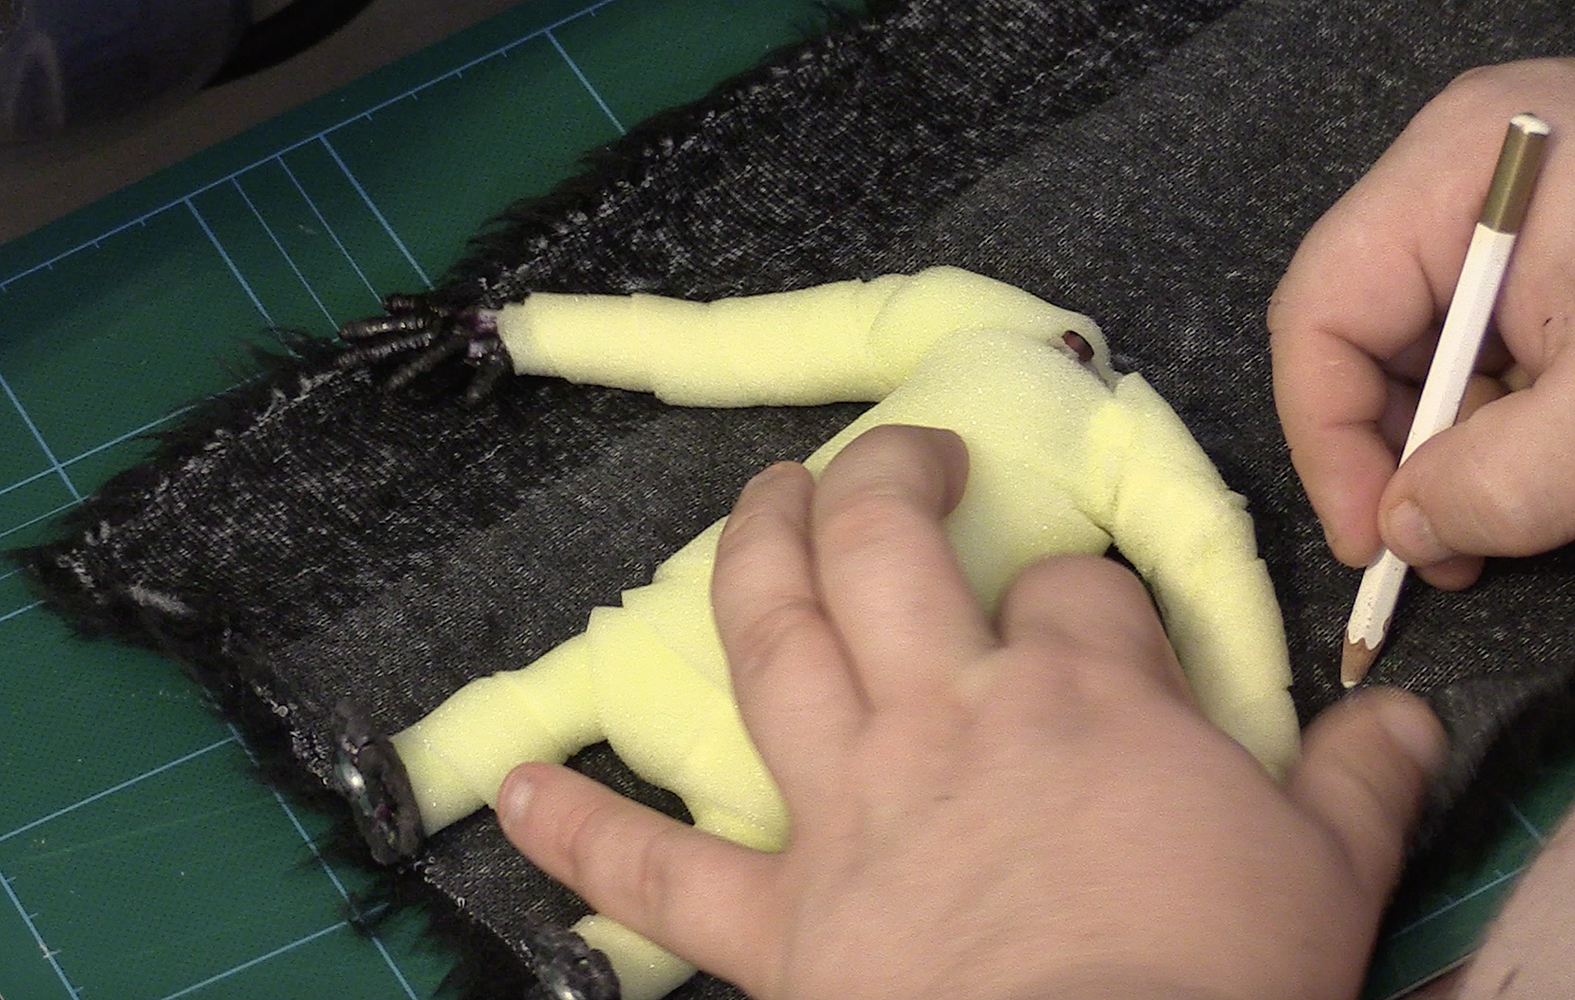


The fur covering was made the simplest way possible, namely as two outlines of the body cut from slightly elastic fake fur and joined together over the padded body using flexible but strong contact cement.

The feet and the chest piece were attached to the padded armature, and parts of the fur were folded over the latex pieces and glued down using liquid latex.


So here are the finished Ro-Men. They're fairly small puppets, standing around seven inches tall. They were, however, very easy to animate at that size, with soft bodies and strong armatures.

At the very beginning of the film, you are introduced to the unpleasant wildlife of the Ro-Man homeworld. This is represented by two puppets having a sort of argument in the barren wilderness.


I decided to shamelessly steal the basic look of these monsters from sci-fi pulp era productions. The first one was inspired by the creatures depicted (though not shown in the actual feature) on the poster for the movie "Journey To the Seventh Planet." The second monster is based on the critter shown on the cover of an old Astounding Stories.

The Astounding Stories inspired beastie had its head sculpted in Monster Clay.

The sections of the legs were also sculpted in clay and cast in latex from a dental plaster mold. I could've built up the leg sections directly onto the armature, Marcel Delgado-style, but doing it this way was quicker and the result was pleasingly symmetrical.

Another basic armature for this puppet. The eyestalks were aluminum wires wrapped with yarn and coated with tinted latex.

Various bits of soft polyurethane composed the muscles of the body, padding out the shape of the puppet.

I cast wrinkly latex skin bits from old plaster skin texture molds, that I always keep on stand-by.


The base colors were tinted latex which was dry brushed on. Augments were made with acrylic airbrush colors. The eyes were simply Photoshop print-outs glued to the back of acrylic spheres using transparent scrapbooking glue. The spheres were also bought from a scrapbooking shop. The nails and teeth are cotton dipped in latex.


The second puppet had a few more body parts sculpted in clay, since it has a somewhat insect- or crab-like appearance.

The claws and mandibles were cast as latex skins, reinforced with a cotton and latex mix, and then filled up with Polymorph thermoplastic, into which aluminum wires were stuck.

Again, a very simple aluminum wire / thermoplastic armature. It's sturdy and light, and perfect for the short sequence in which the monsters appear.

The ridged brow on the head was cut from paper and covered with cotton and latex. The jaw was built up with latex skins over an aluminum wire covered with a yarn wrapping.

The body of this puppet was kept quite simple and smooth, allowing more expression from the sculpted body parts. Overlapping bits of thin polyurethane created the basic body shape.

Again, older skin texture molds were used for the casting of the latex skin covering (I have a whole bunch of skin molds by now). The claws on the feet are also cast in latex from a plaster mold.


Like his colleague, this puppet is dry brushed with tinted latex, touched up with acrylic airbrush paints, and provided with acrylic lens eyes. A piece of fake fur with airbrush touch-ups is glued to the puppet's back with contact cement.
In the next part of my Robot monster saga, I'll go into how the backgrounds were made, and some other stuff about the look of the film.


